I noticed today that an updated version of Dynamo for Vasari/Revit had been released.
Key new features from the wiki:
- User Interface - side panel to allow you to search and then drag and drop new nodes in to place
- User-created nodes – you can make 'sub-nodes' and then reference them elsewhere, these act like writing a reusable function in a programming language
- Python Scripting node – we have integrated a python scripting node
- Math, logic and other nodes – many new nodes added to support evaluation, iteration and looping
When I was getting the above updates, I noticed one I hadn't seen!
Relationship Viewer!?!?!?
From the Wiki: "This add-in takes the user’s current selection and displays a diagram showing its relationship to the other elements in the document. You can use this add-in to visualize and better understand the relationships between objects in Project Vasari."
Sweet expansion of apps we are seeing here. Between Python and Dynamo, some sweet stuff is now possible.
Download page for Vasari and all supported apps:
http://labs.autodesk.com/utilities/vasari/overview/
Sometimes a thing or two on yesterday, a little bit of today and some more of tomorrow...
Thursday, June 28, 2012
Wednesday, May 30, 2012
Insight and Inspiration...
Some very interesting work being done by Nathan Miller, specifically working with the Revit/Vasari API and automation of workflows that impact our daily lives. His blog, "The Proving Ground" highlights some of his recent R&D while his full wiki website has specific examples to get you going and pique your interest.
Great stuff - go check it out!
NOW.
Great stuff - go check it out!
NOW.
 |
| Image via Nathan Miller blog "The Proving Ground" as an example of what he is doing! |
Thursday, May 24, 2012
Information Overload!
So much stuff going on - reflecting back on what I've done since my last post:
- Prepared & presented 2 lunch workshops centered around Vasari & Revit for HMC - AU style complete with handouts, datasets & PPT.
- Work is progressing on building/deploying 2013 Autodesk products.
- Re-evaluating the use of Revit Server.
- Continued mentoring sessions for Revit at various offices.
- And a few others things escaping my mind at the moment.
Tuesday, March 27, 2012
The Real Deal - Viewing a Revit Model on an iPad
So, we've all seen the plugins, exporters, extractors, converters, etc. that promise to let you "view" a Revit model on an iPad. Once you start looking into, you realize quickly that you have to convert your native Revit file format into something else. Well, that has never been good enough for me which is why I'm so excited that I can finally do this! It's so easy, it's not even funny! Here's how it works...
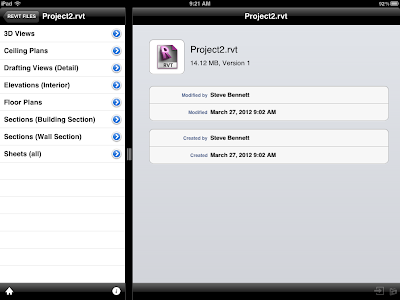
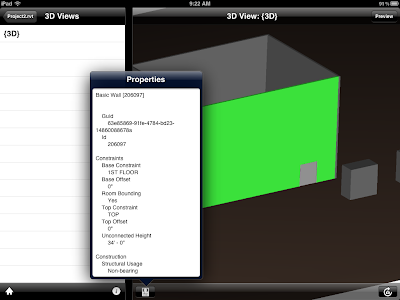
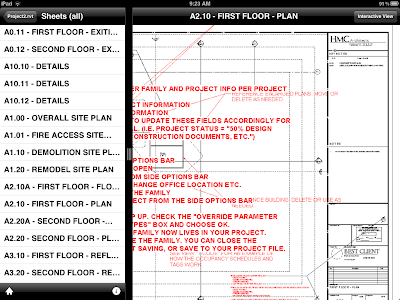
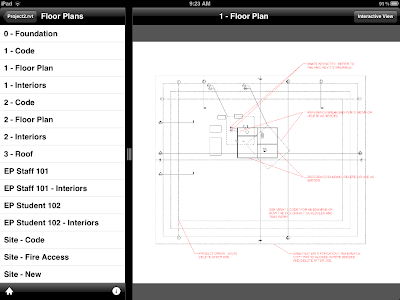
Starting with your Autodesk Buzzsaw account (yes you can run a free 30 day trial to test this out), upload any native Revit project. Click on it to view it. Select one of the Views or Sheets from your model to view. Click the interactive button to actively pan & zoom around the model. If you are in a View, select an object to get metadata about it. Here are some screen grabs from my iPad with a test model I uploaded a few minutes ago!
P.S. I have to give props to HMC Architects Autodesk reseller, Kelar Pacific, for bringing this to my attention - this would have otherwise likely slipped under the rug with the new Autodesk product releases happening!
Starting with your Autodesk Buzzsaw account (yes you can run a free 30 day trial to test this out), upload any native Revit project. Click on it to view it. Select one of the Views or Sheets from your model to view. Click the interactive button to actively pan & zoom around the model. If you are in a View, select an object to get metadata about it. Here are some screen grabs from my iPad with a test model I uploaded a few minutes ago!
 |
| After Initial model is uploaded and selected, you are presented with native Revit Views / Sheets to open |
 |
| Viewing interactively in a 3D Revit View with a Wall selected and displaying metadata |
 |
| Viewing one of the Sheets in the Revit model |
 | ||
| Inspecting a View in the Revit model |
P.S. I have to give props to HMC Architects Autodesk reseller, Kelar Pacific, for bringing this to my attention - this would have otherwise likely slipped under the rug with the new Autodesk product releases happening!
Tuesday, March 13, 2012
Vasari 2.5 Pending Release Preview
Well, Mr. Light is far more organized than I and has already made his blog post on the best new features due on Vasari 2.5 (available shortly)!!!
Go check em out!
Revit link
I will simply report this main new feature that will make many of our designers very happy - PERSPECTIVE!
Yes, that is correct, in Vasari 2.5 you will be able to work in a Perspective 3D view.
Go check em out!
Revit link
I will simply report this main new feature that will make many of our designers very happy - PERSPECTIVE!
Yes, that is correct, in Vasari 2.5 you will be able to work in a Perspective 3D view.
Friday, March 9, 2012
My First Adaptive Component!
So, I've seen plenty of fancy examples using Adaptive Components (AC) float around the RevitVerse, but I've been longing for a good, simple and easy AC that I could build and use on an actual project. Having gone through a number of more complex examples such as some found at AU or RTC, I knew they are really powerful and offer a greater degree of freedom and flexibility than your average Family. So, when it finally hit me on this particular situation, I was very happy. Onto the example!
The Storefront with Flashing Anchored to the Mullions...
So I had a request the other day to have a storefront with mullions bigger on the outers and smaller on the inners. That's great until you are asked to have a reveal on the front face of the outer mullions. Guess what? Mullions only butt join at corners and won't miter (at least from what I could see). Great, so now we are looking at some other options to get what we want. I started looking at an in place component, swept around the perimeter of the the storefront. While it accomplished what I wanted, it hit me that for every storefront, the designer would have to repeat the lengthy process of creating the sweep. Not very efficient. As I was thinking about building a family I pondered which would be most applicable. Generic Model? Face Based? Then it hit me - Adaptive Component to the rescue!
I started up a family based on the Curtain Panel Pattern Based.rfa template file since it has a few things already established. I placed a point on one of the Reference Lines, set my work plane to the point and sketched a rectangle. Next I added some dimensions and labeled them with parameters to be able to flex the size of the flashing. Then, I picked the rectangle, the reference lines and made a sweep. I also added a material parameter and linked it up so it could be set once in the project.
Then, once it was loaded into the project, it was as simple as picking 4 points, one at each corner of the storefront. Easily repeatable, flexible and simple, yet effective. Granted, it may not be the only way to accomplish the end result, nor what AC's were intended for, but it got the job done this time! So if you have been wondering how to make use of AC's in a simpler setting, just keep your eye out - you never know what might come along!
Subscribe to:
Posts (Atom)


