Wednesday, September 27, 2017

3D Connexion Wireless CAD Mouse

It may of taken 2+ years for 3D Connexion to release a wireless version of their wired CAD mouse, but they've finally done it! They released the new wireless version on Tuesday September 19th 2017, I ordered it the same day and received it Saturday of the same week via FedEx Ground (free shipping option). Needless to say, I was fairly excited to get working with it. Over the last couple years, I've grown very accustomed and attached to my wired CAD Mouse. Its fits really well in my hand and I really love having that dedicated middle mouse button. Anyways, onto the new device!

Notes:

  • Fit and finish of product box is on par with a new iPhone product box, well packaged, protected and great graphics to get going quickly.
  • The carry case for the mouse was in its own bag to protect from any scratches.
  • The inside of the carry case is padded on the side that goes against the buttons, nice touch.
  • On the bottom of the mouse, there is an on/off switch, a pairing button and one to switch between the dedicated hardware dongle and Bluetooth.
  • The wireless CAD Mouse is slightly smaller than the wired version, something I wasn't expecting. Initially, I wasn't happy about this, however, I think I will get accustomed to it, seems to be approximately 10-15% smaller overall.
  • I also got the new, smaller mouse pad which seems to be more of a traditional size and fits better for me in a lot of spaces I set up my laptop. Yes I actually use the pad they sell, I've actually had a few issues on semi-reflective issues and getting the mouse to behave correctly. It also seems to glide better on this pad than on others. Plus, it makes that cool fake thunder sound when you hold the pad and wiggle it back and forth in the air. =)
  • Having used it for about 3 days, I'm really loving the lack of a wired connection. By the second day, I needed to plug it in and use it while charging via the included USB as it was lagging a bit on inputs. Unplugged the next morning and its back to being very responsive.
  • Price might seem to be a little higher than your average wireless mouse, however I feel the value is there for the price. High quality construction, well thought out design and a very good sensor for precise picks and clicks.


Friday, May 19, 2017

Tap, Tap, Tap... Is this thing on?

Looks like it is. It's been far too long since I put an update out here. I've been fairly busy with work. Last year I earned my FAA Remote Pilot Airman certificate to fly sUAS (drones) commercially in addition to the typical stuff during the day. The reason I earned my Remote Pilot license was to support the companies need to fly a drone legally for projects. In this process, I've developed workflows for the safe and effective use for drones commercially and developed workflows to successfully utilize the data captured. I'll be presenting some of these efforts at AU this year, if my class is chosen.

Would you vote for my class? If so, please head over to here:
http://au.autodesk.com/speaker-resource-center/call-for-proposals/voting
Search for the term "Fly High!" in the search box.


Wednesday, June 10, 2015

I'm in love with my new 3D Connexion CAD Mouse!!!!

My new 3D Connexion CAD Mouse arrived today!!!! In a nutshell, after using it for just a couple hours, I'm never going to use another mouse again! The single biggest win for this device? A dedicated middle mouse button for panning in viewports.

After I unboxed it (nice packaging too), I downloaded the driver, installed, plugged the mouse in and found a reboot is required. One of the first things I noticed after unboxing it is the USB cord. It is advertised as a braided cord, however in person, looks more like a rope to me and seems out of place on a typical office desk. I like it though! Its cord length should be long enough to head under the desk for those that like their computers out of sight. Its lightweight too, it feels lighter than it should for having that metallic type finish around the base of it.

Once my reboot completed, I immediately sensed a noticeable change in on screen movement of the mouse cursor. It's hard to describe really, more my perception than anything, however it does seem easier to point to a specific object. The buttons seem easier to click and my initial reaction on the middle/right buttons is that it is going to take some getting used to - especially with finger placement (more on this in a moment). The size of the mouse is on par with the Logitech M/N M-U0007, only wider in the mid-body and toward the front. The Logitech mouse allows most of my hand to rest on it with my pinky finger and half of my ring finger hanging off. The old Dell mouse I had been using (M/N M-BAC-DEL5) is even narrower than both the Logitech and CAD Mouse, resulting in half my hand resting on the mouse and 2 fingers hanging off. The wider CAD Mouse design resulted in the whole width of my hand resting on the CAD Mouse and only my pinky finger hangs off the side of it which is just enough to grip it adequately.

The Gesture button does take some effort to click due to its placement on the mouse, yet offers immediate shortcuts in general Windows interface and typical MS Office apps. Things like opening your default browser, copy/paste, top/bottom of page, etc. are all found on the Gesture menu. The cool thing is that it only takes one click to use - click the Gesture button, then slide your mouse in the direction of the command you want which will then activate it without clicking. When the Windows Desktop has focus, Gesture button can access the CAD Mouse properties.

Always one to explore configurations, I found I needed to make an immediate change to default settings. I'm not sure why the CAD Mouse precision defaulted to a Sensor Polling Rate of 250Hz when product is advertised as capable of 1000Hz sampling. After adjusting this to 1000Hz, I felt I needed to increase my default speed settings slightly to match the enhanced sampling rate.

Now that I felt I had a handle on the settings of the CAD Mouse, I decided to give it a shot in Revit.  I noticed the Gesture button has different application specific gestures - I need to look into these more after getting more accustomed to the mouse. Zooming with the scroll wheel is grippy from any non-ergonomic angle and immediately noticeable on how easy it is to scroll. One thing with recent mouse design that drives me bonkers is their tendency to have the ability to roll the wheel left/right in addition to forward/backward. This has been disastrous in my opinion to having a scroll wheel work well as a Pan tool. After 5 minutes using it in Revit, OH MY GOODNESS I DON’T HAVE TO PAN WITH A WHEEL ANYMORE!!!!!!!!!!!!! Getting used to middle mouse button for Pan should take about 5 minutes or less… I can't describe how great it is to be freed from using a wheel to Pan and just use a regular button. It takes me back in time more years than I care to admit, when mouse design was simpler and not driven to appeal to the masses of internet users.

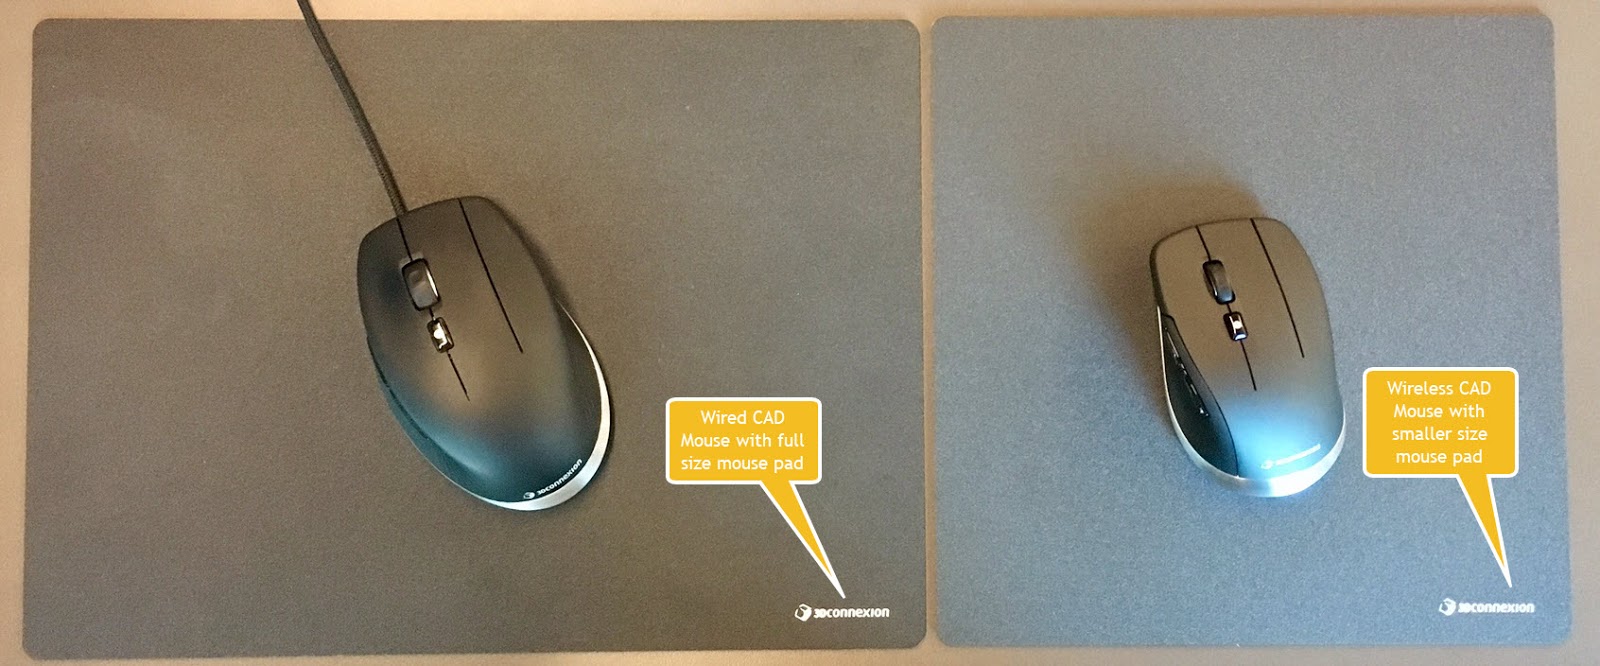
The icing on the cake, so to speak is that I also got the CAD Mouse Pad from 3D Connexion along with the mouse. This is a great, high quality mouse pad. Its also BIG - almost 3 times as big as my old mouse pad (approximate dimensions: old 7.5"x7.75"@58sqin & new 9.75"x13.75"@134sqin). I'm sure they intended it to be placed long side facing me (think widescreen), but then it gets in the way of where I have my laptop docked so I've got it oriented vertically (think vertical video syndrome). Either way, its still way bigger than my last mouse pad - RIP CAD Monkey. The surface provides a seemingly friction-less surface and has a nice rigidness to it which could allow me to mouse on the sofa if I wanted to.

In summary, the two things I love the most on this CAD Mouse are the extra grippy scroll wheel & the dedicated middle mouse button. I do wish it had a wireless option and that the Gesture button wasn't so far back on the device. Otherwise, everything else is just an added bonus that adds up to something more that the sum of its parts. I look forward to using it in more applications too such as AutoCAD & 3ds Max. I have to admit that I was skeptical about it based on its price at first. Now after having spent some time with it, I have to say I would easily justify its cost. I've attached some of my pictures I took to this post, for more info such as detailed specs, pricing and more, head on over to: http://www.3dconnexion.com/products/cadmouse 

CAD Mouse


CAD Mouse Pad


Tuesday, December 9, 2014

Autodesk University 2014 : It's a Wrap!

74,000 plus steps - more than 21 miles walked this year at AU. Multiple classes, business meetings, great keynote sessions, a real life hoverboard and more made up for a great AU.

For me, the class highlight was seeing an entire train maintenance yard modeled in Revit. Rails, ties, utilities, structures, signage and more was all done in Revit. Great tips for challenges encountered along the way. Check out the class if you can! CV5504-P Case Study for a Civil-Based BIM Project Using Revit

The keynote highlight had to be the hoverboard. As a kid, Back to the Future II hit a sweet spot for me and I grew up wishing I had one. Now they are real! Well, difficult to obtain and challenging to find a surface to ride them on but definitely real! Check out HendoHover for more info.

Now I need to bring together the ideas found into the everyday workflow our projects see, should be a fun 2015 lurking right around the corner!


Tuesday, January 28, 2014

The Dilemma of Multi-Building Campus Projects and Similar Details in Revit

If you've worked with Revit for any length of time and have been on a project with multiple buildings, I'm sure you've realized that each building will likely have similar details between them. If the documentation sheets are kept in each building, you soon realize that you are going to have duplicate details in each project to manage. In the past with other software platforms, you could simply link in each detail multiple times and be done with it. In Revit, the project tends to bog down with multiple links of individual details and linking in one project with many details doesn't help.

I've seen some creative ideas to get around this dilemma. One method involved creating a separate project with floor plans having multiple Dependent views cropped to individual details. Then, linking in this project to each individual building and creating more views you could start to reference details that are similar.

Another method is to link each building into a master site project and create all documentation in this master project. Depending on the size, this method can become sluggish as well. It also requires you to have views setup in advance in each building for reference in the master. Also, you inevitably have 2 copies of Revit running simultaneously for both the master site and individual building file. Again, more duplicated work.

What if I told you we could have the best of both worlds when it came to these details? If you haven't heard of Revolution Design, allow me to introduce you to a tool they have which solves this dilemma.

Revolution Design's - Revit Worfklow "autoLink"
This tool has the potential to save your team a lot of time and headaches.

Example:
Project model A = One of our buildings on a campus
Project model B = Our master set of similar details shared by each building

Using Workflow with it's autoLink function, I've built a detail bubble that will be placed in "A". The autoLink tool will allow me to place this special bubble. Next, I link into model "A", model "B", without needing to show it in any views. Finally, I'll type into the autoLink detail bubble, the detail number and sheet number of the corresponding detail from "B". When I tell autoLink to update linked references, the detail bubble is linked up with the corresponding view from "B". Using the detail view reference ID, if the detail number or sheet number for the view in project "B" ever changes, the bubble in "A" will be updated as well. Now, I can setup sheets in "A" as place holders for the sheets in "B".

I'd recommend you check out this tool! There are other more obvious uses for autoLink too, this just happens to be the obscure use for it. Revolution Design makes some other highly useful tools as well that are worth taking a look.

Tuesday, January 14, 2014

Finding Something Positive - Everyday

It's so easy to lose sight of the things that really matter - especially if things don't go the way we would hope. I know we all face something everyday that can cause us to feel the day was completely wasted. Why not flip things around? Why not spend your day looking for the best thing that happened instead of grumbling about the bad thing that happened?

My cousin is looking for something positive everyday and blogging about it each time. Since she works as a nurse, she sees plenty of things most would rather not face, everyday. Yet she is finding something positive everyday. If you are looking for an encouraging read, check out her blog: A Positive 365!

Wednesday, December 18, 2013

Benchmarking the NEW BOXX LEGO Workstation and RenderPro

Earlier this month at Autodesk University, I had the opportunity to obtain the latest offering from BOXX - their new LEGO Workstation and Lego RenderPro. I could hardly wait to get these two systems built and benchmarked and share the results with everyone. Well, the results are in and these are the fastest systems with the most performance per dollar you can get in the LEGO world. I have to admit, I've never been able to assemble a LEGO kit as quickly as I did with these two. I hope you enjoy my review of these limited edition systems from BOXX and NO you can't have these - I've already gifted them to my kids!

In my testing, I found that I needed to miniaturize myself in order to get the full appreciation of the Workstation and RenderPro. Here you can see me basking in the full glory of the immense Workstation:


You'll note that just like other systems they offer, there are plenty of USB ports on the front - 4 for the Workstation and an extra on the RenderPro. Standard power on and HDD function LEDs on both units along with Power & Reset Buttons.


On the back of the Workstation, things get fun. A total of TEN Expansion slots, Dual Ethernet ports, another 4 USB ports and more that are too small to make out what they are... The RenderPro has Dual Ethernet ports and another 2 USB ports. You can see me eagerly applying the front face decal in this photo to the RenderPro.


Here you can see me taking a quick stroll across the top of the RenderPro after its been docked with the Workstation. Together they make a formidable foe that will render any LEGO scene faster than you can say Minecraft!


I also wanted to give everyone a sneak peak inside the Workstation to show you how cleanly assembled it is and easy to work on should you want to utilize those expansion bays. Despite the thick walls of the LEGO chassis, I found it incredibly easy to work on. You can clearly see they spared no expense on this liquid cooled, overclocked XEON CPU. Given that there are SIX stickers on the Workstation and FIVE on the RenderPro, that counts for an extra 55 Horsepower total above the overclocked 4.5GHz if you count 5HP per sticker. I have to say I was very impressed with these two systems and would like to thank BOXX Technologies for the opportunity get hands on time with these special systems.

Every other LEGO computer system you could buy is just a complete BRICK.