Showing posts with label Revit. Show all posts

Wednesday, June 10, 2015

I'm in love with my new 3D Connexion CAD Mouse!!!!

My new 3D Connexion CAD Mouse arrived today!!!! In a nutshell, after using it for just a couple hours, I'm never going to use another mouse again! The single biggest win for this device? A dedicated middle mouse button for panning in viewports.

After I unboxed it (nice packaging too), I downloaded the driver, installed, plugged the mouse in and found a reboot is required. One of the first things I noticed after unboxing it is the USB cord. It is advertised as a braided cord, however in person, looks more like a rope to me and seems out of place on a typical office desk. I like it though! Its cord length should be long enough to head under the desk for those that like their computers out of sight. Its lightweight too, it feels lighter than it should for having that metallic type finish around the base of it.

Once my reboot completed, I immediately sensed a noticeable change in on screen movement of the mouse cursor. It's hard to describe really, more my perception than anything, however it does seem easier to point to a specific object. The buttons seem easier to click and my initial reaction on the middle/right buttons is that it is going to take some getting used to - especially with finger placement (more on this in a moment). The size of the mouse is on par with the Logitech M/N M-U0007, only wider in the mid-body and toward the front. The Logitech mouse allows most of my hand to rest on it with my pinky finger and half of my ring finger hanging off. The old Dell mouse I had been using (M/N M-BAC-DEL5) is even narrower than both the Logitech and CAD Mouse, resulting in half my hand resting on the mouse and 2 fingers hanging off. The wider CAD Mouse design resulted in the whole width of my hand resting on the CAD Mouse and only my pinky finger hangs off the side of it which is just enough to grip it adequately.

The Gesture button does take some effort to click due to its placement on the mouse, yet offers immediate shortcuts in general Windows interface and typical MS Office apps. Things like opening your default browser, copy/paste, top/bottom of page, etc. are all found on the Gesture menu. The cool thing is that it only takes one click to use - click the Gesture button, then slide your mouse in the direction of the command you want which will then activate it without clicking. When the Windows Desktop has focus, Gesture button can access the CAD Mouse properties.

Always one to explore configurations, I found I needed to make an immediate change to default settings. I'm not sure why the CAD Mouse precision defaulted to a Sensor Polling Rate of 250Hz when product is advertised as capable of 1000Hz sampling. After adjusting this to 1000Hz, I felt I needed to increase my default speed settings slightly to match the enhanced sampling rate.

Now that I felt I had a handle on the settings of the CAD Mouse, I decided to give it a shot in Revit.  I noticed the Gesture button has different application specific gestures - I need to look into these more after getting more accustomed to the mouse. Zooming with the scroll wheel is grippy from any non-ergonomic angle and immediately noticeable on how easy it is to scroll. One thing with recent mouse design that drives me bonkers is their tendency to have the ability to roll the wheel left/right in addition to forward/backward. This has been disastrous in my opinion to having a scroll wheel work well as a Pan tool. After 5 minutes using it in Revit, OH MY GOODNESS I DON’T HAVE TO PAN WITH A WHEEL ANYMORE!!!!!!!!!!!!! Getting used to middle mouse button for Pan should take about 5 minutes or less… I can't describe how great it is to be freed from using a wheel to Pan and just use a regular button. It takes me back in time more years than I care to admit, when mouse design was simpler and not driven to appeal to the masses of internet users.

The icing on the cake, so to speak is that I also got the CAD Mouse Pad from 3D Connexion along with the mouse. This is a great, high quality mouse pad. Its also BIG - almost 3 times as big as my old mouse pad (approximate dimensions: old 7.5"x7.75"@58sqin & new 9.75"x13.75"@134sqin). I'm sure they intended it to be placed long side facing me (think widescreen), but then it gets in the way of where I have my laptop docked so I've got it oriented vertically (think vertical video syndrome). Either way, its still way bigger than my last mouse pad - RIP CAD Monkey. The surface provides a seemingly friction-less surface and has a nice rigidness to it which could allow me to mouse on the sofa if I wanted to.

In summary, the two things I love the most on this CAD Mouse are the extra grippy scroll wheel & the dedicated middle mouse button. I do wish it had a wireless option and that the Gesture button wasn't so far back on the device. Otherwise, everything else is just an added bonus that adds up to something more that the sum of its parts. I look forward to using it in more applications too such as AutoCAD & 3ds Max. I have to admit that I was skeptical about it based on its price at first. Now after having spent some time with it, I have to say I would easily justify its cost. I've attached some of my pictures I took to this post, for more info such as detailed specs, pricing and more, head on over to: http://www.3dconnexion.com/products/cadmouse 

CAD Mouse


CAD Mouse Pad


Tuesday, December 9, 2014

Autodesk University 2014 : It's a Wrap!

74,000 plus steps - more than 21 miles walked this year at AU. Multiple classes, business meetings, great keynote sessions, a real life hoverboard and more made up for a great AU.

For me, the class highlight was seeing an entire train maintenance yard modeled in Revit. Rails, ties, utilities, structures, signage and more was all done in Revit. Great tips for challenges encountered along the way. Check out the class if you can! CV5504-P Case Study for a Civil-Based BIM Project Using Revit

The keynote highlight had to be the hoverboard. As a kid, Back to the Future II hit a sweet spot for me and I grew up wishing I had one. Now they are real! Well, difficult to obtain and challenging to find a surface to ride them on but definitely real! Check out HendoHover for more info.

Now I need to bring together the ideas found into the everyday workflow our projects see, should be a fun 2015 lurking right around the corner!


Tuesday, January 28, 2014

The Dilemma of Multi-Building Campus Projects and Similar Details in Revit

If you've worked with Revit for any length of time and have been on a project with multiple buildings, I'm sure you've realized that each building will likely have similar details between them. If the documentation sheets are kept in each building, you soon realize that you are going to have duplicate details in each project to manage. In the past with other software platforms, you could simply link in each detail multiple times and be done with it. In Revit, the project tends to bog down with multiple links of individual details and linking in one project with many details doesn't help.

I've seen some creative ideas to get around this dilemma. One method involved creating a separate project with floor plans having multiple Dependent views cropped to individual details. Then, linking in this project to each individual building and creating more views you could start to reference details that are similar.

Another method is to link each building into a master site project and create all documentation in this master project. Depending on the size, this method can become sluggish as well. It also requires you to have views setup in advance in each building for reference in the master. Also, you inevitably have 2 copies of Revit running simultaneously for both the master site and individual building file. Again, more duplicated work.

What if I told you we could have the best of both worlds when it came to these details? If you haven't heard of Revolution Design, allow me to introduce you to a tool they have which solves this dilemma.

Revolution Design's - Revit Worfklow "autoLink"
This tool has the potential to save your team a lot of time and headaches.

Example:
Project model A = One of our buildings on a campus
Project model B = Our master set of similar details shared by each building

Using Workflow with it's autoLink function, I've built a detail bubble that will be placed in "A". The autoLink tool will allow me to place this special bubble. Next, I link into model "A", model "B", without needing to show it in any views. Finally, I'll type into the autoLink detail bubble, the detail number and sheet number of the corresponding detail from "B". When I tell autoLink to update linked references, the detail bubble is linked up with the corresponding view from "B". Using the detail view reference ID, if the detail number or sheet number for the view in project "B" ever changes, the bubble in "A" will be updated as well. Now, I can setup sheets in "A" as place holders for the sheets in "B".

I'd recommend you check out this tool! There are other more obvious uses for autoLink too, this just happens to be the obscure use for it. Revolution Design makes some other highly useful tools as well that are worth taking a look.

Friday, June 28, 2013

Are You Brave Enough to Ask for Feedback?

I've been doing a lot of Revit training for the company I work at this year. I did plenty of training when I worked previously at U.S. CAD and at the conclusion of every class we always had the students fill out a survey. Sometimes the feedback was uplifting, other times it was a wake up call. It takes a certain mindset to process feedback from others on something you spend a lot of time doing and have put a lot of energy into. To put it to use is another thing all together.

After a few class lately, it occurred to me that I had no way of really knowing what those who attended thought about what they just learned and how it was delivered. So, I put together a brief survey for each different topic via Survey Monkey and started passing them out. I got some really good comments back already, albeit in a limited fashion. I think I am going to start requiring attendees to fill out the survey before they leave at the end of the class so I can get better participation in the survey's.

So, would you ask for feedback?

Wednesday, April 24, 2013

Specifying a Computer to run Modern Design Applications

Much discussion surrounds system specs for running modern design applications. I've made previous posts about system specs (wow that's old!), Jay Zallan has done so recently, but I have a slightly different take on it now after my recent benchmark tests. To make it simple there are 5 main things to consider when spec'ing out a system, something I've touched on previously. I've listed them here in order of importance.
  1. OS
  2. CPU
  3. RAM
  4. Video/Graphics Card (GPU)
  5. Hard Drive
The tough part comes when trying to spec a system for a user. Do you spec one configuration only that covers the majority of needs or have multiple ones depending on a users focus? A designer might be more concerned with running Adobe products, Rhino, Sketchup and Revit early in the project. A sustainability expert would be running still different software while someone wrapping up construction documents would be spending a majority of their time in Revit. Until recently, we have been specifying one spec for all positions, one that can handle large Revit projects with ease.

The thing I noticed with my recent benchmarks testing Revit is that it did not benefit as much from an expensive GPU as I previously thought. Also, I found that steps taken that should benefit from a SSD did not produce as much benefit as I'd hoped. When it comes to OS, you better be on a 64bit platform or most of the rest won't help you.

If you are on a tight budget like I am and trying to get the most benefit for your money, I would go with the fastest CPU you can get as that seems to drive the most benefit for productivity. Next, add as much RAM as you can get, starting with 16GB minimum as Autodesk recommends.

As for a GPU, Revit did great on my benchmark tests with a mid-range card, the Quadro 600. The jury is still out on what happens with it in other applications like 3ds Max, Rhino or Sketchup. Initial experiences from our in house 3ds Max expert Chris Grant said he felt that viewport performance was very snappy, more so than his desktop running a Quadro 4000 with dual Xeon CPU's. We need more testing in other applications, but I predict the Quadro 600 will suffice for them as well. My thought is that because on our BOXX 4050 & the CPU was running overclocked, the CPU was able to hand the data off to the GPU faster for it to process things.

When it comes to hard drives, there are a few things to consider. If you are running a regular physical hard drive (HDD), RPM of the disk speed as well as transfer rates from disk to CPU/RAM affect how fast data can be read/written. You can get some pretty high RPM drives these days for HDD. I noticed on the spec sheets from BOXX that their system with a HDD running @ 7200RPM had the same transfer rate as their SSD. Getting to the data is one thing, sending it around the computer is the other part. I need to run more testing on a similarly configured BOXX with a Solid State Drive (SSD) to confirm my suspicion, but I would have to guess that running with a HDD vs SSD does not offer the performance boost when using Revit that one would hope for.

When does Revit access the hard drive? Per the Revit Model Performance Technical Note, it is only during model load, model save and any hard disk swapping managed by the Windows OS.  What is hard disk swapping? According to this page on Wikipedia, it is part of virtual memory (VM) implementation in the operating system that allows disk storage for data that does not fit into physical RAM. So to me, I interpret that to mean Revit only uses VM if it runs out of RAM. If you have enough RAM, you shouldn't need VM with Revit. This in turn means Revit only really accesses the hard drive when you first open a model and when you save / sync with central. Overall, this is a far less occurring activity during the day and for only short bursts compared with model creation/editing and viewport regeneration. Also, with many large models, they are central files and a good amount of that save time is sending data to/from the server over your network. So I guess that's a long winded way of saying I don't see the benefit from the added cost of a primary SSD. I'm not saying it won't speed things up here and there, I'm just looking at the overall picture of trying to get the most value for my money.

In summary, I can't stress enough that you need to spend as much of your budget as you can on the fastest CPU you can get your hands on. It will just make life so much more productive and pay for itself much faster than other bits you might splurge on. If I had a rich uncle give me a bag full money to go buy whatever desktop I wanted, it would have the fastest CPU (multi-socket/multi-core), best dual GPU setup with a couple SSD's and as much RAM as I could stuff into it. Until then, I'll squeak by with a fast CPU and get by with lesser components elsewhere.

Monday, April 8, 2013

Benchmarking the 3DBOXX 4050 XTREME vs Dell T3600

Well, the numbers are in and I have to say that I'm very happy where they landed! In short, I would be looking at a 28% productivity boost to run the BOXX 4050 instead of the Dell T3600. In my previous post, I mentioned the specs between the Dell T3600 & the BOXX 4050 Xtreme. I've since updated that post slightly to more accurately reflect the T3600 specs that we use. Now for some numbers breakdown.

The Benchmark Tests
I have to give credit to RevitForum.org for their posting an updated version of the original AUbench Revit journals and updating the scripts to handle the new versions of Revit. You can download a copy of the same benchmark tool I used (If not a current member you'll need to signup, its free). This benchmark allowed great consistency and automated the majority of testing between systems and versions of Revit. I also ran this benchmark on a couple laptops we have and some of our older systems to get some historical context as time marches on. I also kind of wanted to see how the gap increased the father back we went on T3500 & T3400 models we have floating on the floor. Each machine and each version of Revit ran the benchmark tool 3 times to ensure I could get a fair average.

I also performed some manual tasks on both the T3600 & the 4050. It consisted of working with a Revit 2011 model that was 495MB in size. I took the model and timed the tasks of upgrading it from 2011 to 2012 and then to 2013. Other things were done and timed and noted. One thing to note was that the upgrade from 2012 to 2013 took a long time, much longer than I expected on both systems. Something to watch for as projects are upgraded.

Items of Note

  • As each version of Revit progressed, things took slightly longer to complete, as shown in the total averages below.
  • Many tasks I previously thought of as something being driven by the GPU are still handled by the CPU. For example, the benchmark measures time it takes the viewport to regenerate with Hardware Acceleration (HA) both on and off. However, between the 2 systems, the T3600 has a better video card than the 4050. So I expected the tests with HA on to run faster on the T3600 than on the 4050. However even with a lesser video card, the 4050 still outperformed the T3600!!! This proves that even though view regeneration should be handed off completely to the GPU, the CPU still processes much of the data. Therefore money spent on a faster CPU will go farther than a fancy GPU.
  • My laptop I use that was purchased 2 years ago with a SSD primary HD, nice video card and 1.73GHz i7 CPU got spanked by a new, midrange laptop handed out to Project Managers in Model Creation and Rendering. However, it's on-board graphics card was no match for my Quadro 2800M, my laptop owned it in those tests. So, there is some credence to having some kind of a graphics card and not relying solely with an on-board GPU integrated into the motherboard. This confirms what I have felt over the time of using my laptop, the SSD doesn't offer as much of a boost in performance as I'd hoped. Put the money in the CPU!

In Conclusion
I know what you are thinking - "How do I convince management/purchasers/IT to switch to BOXX from their cherished status quo?" I've found that you can throw graphs and percentages and "everyone else is doing it" until you are blue in the face. What really gets them is cold hard cash. How much $$$$ will the company save if they use this new desktop that costs more than the status quo?


The steps taken in the benchmark tests represent things that would be done many times throughout the day, but for arguments sake, let’s say a person doesn't spend all their time using Revit. In fact, I’ll go out on a limb and say we can only apply the increase in speed over the T3600 once per day for an hour. Let’s run that number out over the course of a year and say the persons billable rate is $75/hour (just a guess for a position that involves heavy use of Revit).
$75/hour * 250 working days per year  = $18750

This means that if the BOXX runs 28% faster than our T3600, we would save about $5250 per year on salary as we could get 28% more work done. We would save even more if the person was on an older system.
Even if the MSRP on the BOXX was roughly $3200, ROI is paid in less than a year!

So, the next time you are due for replacing a system that has become outdated or you are simply looking for the fastest system $$$$ can buy, I'd recommend you check out BOXX and their 4050 Xtreme!


Numbers & Graphs!
For simplicity, I'll list times & percentages first, followed with some graphs.
Hard numbers

Pretty graphs


Thursday, March 14, 2013

UnBOXXing the 3DBOXX 4050 XTREME

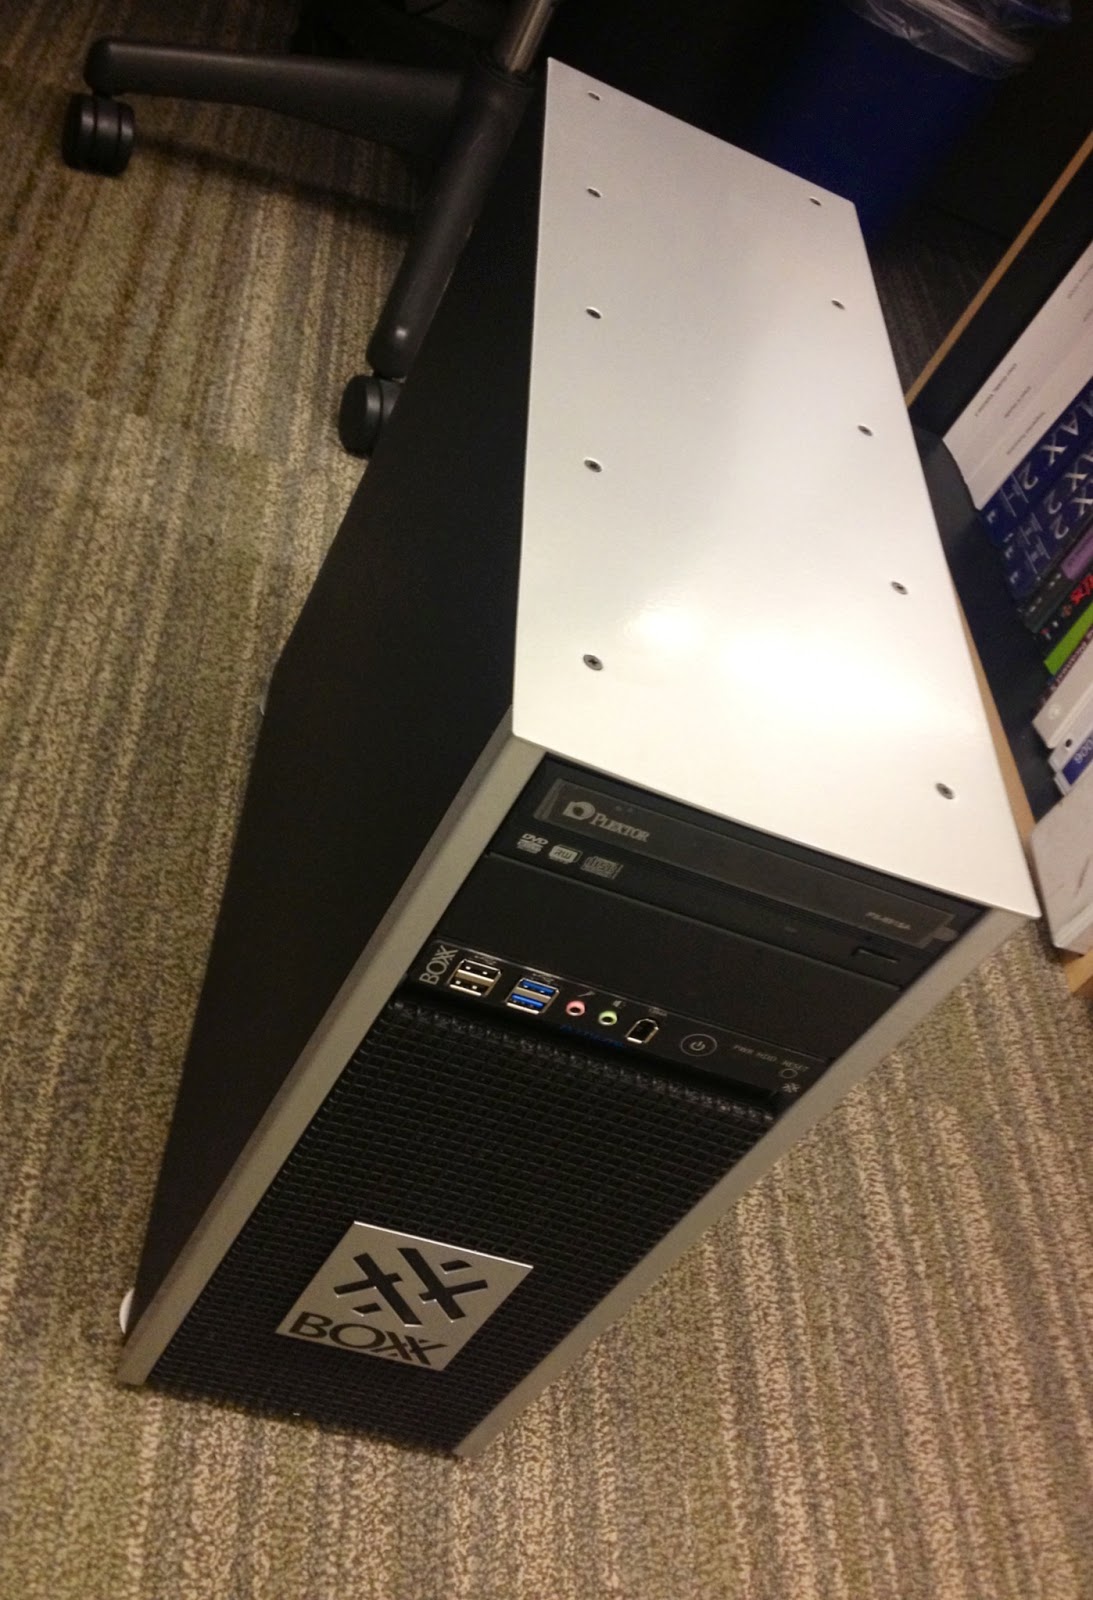
Today I was rather excited as I had a SMALL present delivered, courtesy of BOXX Technology. HMC is taking a look at their desktop system called 3DBOXX 4050 XTREME.

The system specs we currently use for Revit workstations are Dell T3600 with single socket, quad core hyperthreaded Xeon chips running @ 3.6GHz, 16GB RAM @ 1600MHz, nVidia Quadro 4000 graphics card and a 7200RPM 500GB hard drive with transfer rates @ 6GB/s.

The 3DBOXX 4050 XTREME specs are Single socket, quad core hyperthreaded  i7 - water cooled & overclocked @ 4.75GHz, 16GB RAM @ 1600MHz, nVidia Quadro 600 graphics card and a 7200RPM 500GB hard drive with transfer rates @ 6GB/s (expanded spec sheet).

I plan to run some Revit Benchmark testing on it sometime over the next couple weeks and post back what the results are. I fully expect an unfair fight, but I am trying not to get too confident the 4050 will trounce the Dell. In the meantime, here are the unBOXXing photos I took. This has to be one of the cleanest packaging jobs I've seen in a while, both inside the cardboard as well as inside the 4050. Some of the guys didn't feel the design of the outside of the 4050 was elegant, but I've always been a function over form type of guy. For me, I like it - it looks rugged, no non-sense, no frills and what's under the hood is what counts.
The BOXX

Cleeeeean....
Accessory boxx removed.
Accs. boxx - everything you need to expand the 4050, plus "the shirt".
The BOXX W4050XT sits in its unpackaged glory...
It's like a logo on a car almost...
Tons of ports, plenty of room to expand.
Sooo clean and simple - love it! HDD is on other side of panel behind motherboard.

Tuesday, August 21, 2012

Well, it finally happened...

Project Vasari has graduated from a Technology Preview on Autodesk Labs to a full fledged beta.

We all knew this would happen eventually. We all know that after beta versions, they become customer ship versions. Those usually have a price tag associated with them.

For now, Vasari Beta1 can be downloaded for free still.


Monday, July 16, 2012

USC Practical BIM 2012 Highlights

USC Practical BIM 2012 event this year was excellent! Great speakers sharing what they've done to make BIM practical for them and how we can do the same. For those that weren't able to be there, here are some of the highlights from the day.

Session 1A: Practicing Practical Practice
Some called this slot the BIM Dream Team as Marcello Sgambelluri, Jay Zallan & Troy Gates presented topics. Marcello talked about project budgets and not allowing over zealous modelers eat away your fees by generating unneeded geometry. Just because its spatially correct, doesn't mean its nessecary. Talk with the whole project team, including the owner, to ensure you are working towards a common goal. Jay mentioned that AutoCAD processes don't always require architectural practices to be good, whereas BIM processes do - something I'd agree with. This means planning! Plans are nothing - planning is everything! Do you plan out how you will execute your next BIM project or simply hope it will go well? Troy spoke about how his company always follows a BIM execution plan for BIM projects they work on. It's essential for seamlessly integrating all the teams and the technology used. In all, I'd have to say these 3 sessions were the highlight of the entire day!

Session 2A: Connection : Customization : Cloud
Johnson Fain showed off some of their design work done in Revit to kick off this session - great designs were shown! It was interesting to see their software history shown as having gone from AutoCAD to Revit around 2005. Dennis Sheldon, CTO of Gehry Technologies, shared some insight on projects they are working on, including a massive shared project with over 200 concurrent shared users accessing the model, 80 trades involved & spread internationally across 12 countries. Mario Guttman presented some of the great tools he has been developing for Revit, specifically those found at Whitefeet. Go check them out if you haven't already!

Session 3A: Integration : Collaboration : Ownership
Michael Cervantes from LACCD presented their efforts on BIM from an owners perspective. They are holding lofty standards on their projects done in BIM to ensure they can take advantage of the data downstream after project completion. This was also the first time I'd see a presentation done with Prezi - really slick presentation tool that's way better than PPT.

Session 4A: BIM Implementation
It was great to see David Graue & Gautam Shenoy present how they've approached bringing BIM into HNTB. They likened BIM to Warcraft - A Massively Multiplayer Online Role Playing Game (MMPORPG). Everyone has a role to play - learn to rely on each others strengths as you go on your campaign!

Session 5A: Real and Virtual
Kimon Onuma presented the efforts that Onuma Systems have put into with the California Community College District (CCCD) on getting all campus facility data into an online system. Due to the efforts they've put into it, you can view the majority of info about CCCD facilities in Google Earth. You can also continue to add info and data as new projects are completed or as existing buildings are retrofitted. Kimon closed by asking "What would you do with 71 million square feet of BIM"? Why not surf it?


Hopefully, you too will find success on your next BIM project by applying practical efforts to it!


Thursday, June 28, 2012

Plugin Apps for Project Vasari!

I noticed today that an updated version of Dynamo for Vasari/Revit had been released.

Key new features from the wiki:
- User Interface - side panel to allow you to search and then drag and drop new nodes in to place
- User-created nodes – you can make 'sub-nodes' and then reference them elsewhere, these act like writing a reusable function in a programming language
- Python Scripting node – we have integrated a python scripting node
- Math, logic and other nodes – many new nodes added to support evaluation,  iteration and looping


When I was getting the above updates, I noticed one I hadn't seen!
Relationship Viewer!?!?!?
From the Wiki: "This add-in takes the user’s current selection and displays a diagram showing its relationship to the other elements in the document. You can use this add-in to visualize and better understand the relationships between objects in Project Vasari."


Sweet expansion of apps we are seeing here. Between Python and Dynamo, some sweet stuff is now possible.

Download page for Vasari and all supported apps:
http://labs.autodesk.com/utilities/vasari/overview/


Wednesday, May 30, 2012

Insight and Inspiration...

Some very interesting work being done by Nathan Miller, specifically working with the Revit/Vasari API and automation of workflows that impact our daily lives. His blog, "The Proving Ground" highlights some of his recent R&D while his full wiki website has specific examples to get you going and pique your interest.

Great stuff - go check it out!


NOW.

Image via Nathan Miller blog "The Proving Ground" as an example of what he is doing!

Tuesday, March 27, 2012

The Real Deal - Viewing a Revit Model on an iPad

So, we've all seen the plugins, exporters, extractors, converters, etc. that promise to let you "view" a Revit model on an iPad. Once you start looking into, you realize quickly that you have to convert your native Revit file format into something else. Well, that has never been good enough for me which is why I'm so excited that I can finally do this! It's so easy, it's not even funny! Here's how it works...

Starting with your Autodesk Buzzsaw account (yes you can run a free 30 day trial to test this out), upload any native Revit project. Click on it to view it. Select one of the Views or Sheets from your model to view. Click the interactive button to actively pan & zoom around the model. If you are in a View, select an object to get metadata about it. Here are some screen grabs from my iPad with a test model I uploaded a few minutes ago!


After Initial model is uploaded and selected, you are presented with native Revit Views / Sheets to open

Viewing interactively in a 3D Revit View with a Wall selected and displaying metadata
 
Viewing one of the Sheets in the Revit model

Inspecting a View in the Revit model


P.S. I have to give props to HMC Architects Autodesk reseller, Kelar Pacific, for bringing this to my attention - this would have otherwise likely slipped under the rug with the new Autodesk product releases happening!

Friday, March 9, 2012

My First Adaptive Component!

So, I've seen plenty of fancy examples using Adaptive Components (AC) float around the RevitVerse, but I've been longing for a good, simple and easy AC that I could build and use on an actual project. Having gone through a number of more complex examples such as some found at AU or RTC, I knew they are really powerful and offer a greater degree of freedom and flexibility than your average Family. So, when it finally hit me on this particular situation, I was very happy. Onto the example!

The Storefront with Flashing Anchored to the Mullions...
So I had a request the other day to have a storefront with mullions bigger on the outers and smaller on the inners. That's great until you are asked to have a reveal on the front face of the outer mullions. Guess what? Mullions only butt join at corners and won't miter (at least from what I could see). Great, so now we are looking at some other options to get what we want. I started looking at an in place component, swept around the perimeter of the the storefront. While it accomplished what I wanted, it hit me that for every storefront, the designer would have to repeat the lengthy process of creating the sweep. Not very efficient. As I was thinking about building a family I pondered which would be most applicable. Generic Model? Face Based? Then it hit me - Adaptive Component to the rescue!

I started up a family based on the Curtain Panel Pattern Based.rfa template file since it has a few things already established. I placed a point on one of the Reference Lines, set my work plane to the point and sketched a rectangle. Next I added some dimensions and labeled them with parameters to be able to flex the size of the flashing. Then, I picked the rectangle, the reference lines and made a sweep. I also added a material parameter and linked it up so it could be set once in the project.


Then, once it was loaded into the project, it was as simple as picking 4 points, one at each corner of the storefront. Easily repeatable, flexible and simple, yet effective. Granted, it may not be the only way to accomplish the end result, nor what AC's were intended for, but it got the job done this time! So if you have been wondering how to make use of AC's in a simpler setting, just keep your eye out - you never know what might come along!

Thursday, February 16, 2012

Revit Server plus Imaginit Clarity

Are you using Revit Server and looking to have multiple companies utilize collaborating on a single server? Then look no further because Imaginit Clarity for Revit Server will do just that. Not only will it help manage permissions to keep them from seeing Revit models they shouldn't, it can automate tasks such as printing PDF sets, modifying schedules and more. This is a game changer.

Now, if only I could have multiple Central Revit Servers, then I would be set. That to me has been the only draw back to date...

Thursday, February 9, 2012

Factory Feedback - Revit Server

The Revit Factory team is looking for your feedback regarding Revit Server. Did you consider using it? Use it on a project? Implement it as a BIM/CAD Manager? Then they would love to hear what you have to say.

RS Survey link

Tuesday, February 7, 2012

Factory Feedback - Links and Underlays

The Revit Factory is again asking for your feedback on Revit behavior. Please go help them out - your feedback may very well affect how you select items in Revit!

Links and Underlay Selection

Friday, January 27, 2012

Restructuring for BIM Success

A recent article published in Design Intelligence, Restructuring for BIM Success, written by my colleague Jay Zallan couldn't have been written more succinctly. I can't stress how true the following statement he made is:
"CAD processes don’t require that architectural practices be good, but BIM processes do because without teamwork, communication, and defined processes, firms cannot realize the full benefits of BIM."
I've seen this personally many times. If you haven't already read the article, I would encourage you to give it a read. More importantly, at the end of the article is a series of links to BIM resources for everything you would need to put BIM into practice at your firm, if it isn't already. If BIM is in place, these documents can serve as a way to compare what your firm is doing with what others are putting in place for a successful BIM experience. Lastly, if you haven't read it before, Jay's blog: "Fear and Loathing In a CAD vs. BIM World" has some great content regarding Revit and BIM - check it out!

Friday, January 20, 2012

AUGI World - January 2012 - INI vs Outie...

The latest issue is out - AUGI World - January 2012 - why not check it out on your Friday? There's something for everyone. AutoCAD, Civil 3D, Inventor, IT Systems, Navisworks, Revit and more are discussed! So much good stuff, plus a little article I wrote on taking the Revit.ini file and making it yours. Go get your copy now!

AUGI is also wanting to know, how did you come to know about AUGI? Quick survey on their home page: Survey link


As a side note, the Revit Factory is looking for your input - do you run with Press & Drag on or off? Seems like a fitting survey after the AUGI article I wrote. Leave a note! I did!

Friday, October 21, 2011

Node Based Control for Functions + Revit = ~gasp~

Is this what I think it is?
dynamo + arduino

A node based workflow for Revit? What do you say now, lovers of grasshopper? =)

Yes I know it's not fully there, but still...

Tuesday, October 11, 2011

Elevation tags in Revit not updating...

On Monday this week I spent about 4 hours cursing at elevation tags in Revit. Last I recalled, an elevation tag in Revit is supposed to update to reflect the detail and sheet info once placed on a sheet, no matter what. Well, not this time. I could change the detail number in properties for the elevation and it would show on the sheet and in properties as having updated, but the marker itself would not update. Steve Stafford posted a great video showing this. Steve S. found that changing the elevation type would cause the marker to update and display correctly.

I also found that the marker would resume displaying updates to the detail number on a consistent basis provided it cut building geometry. If the extents of the marker view depth did not cross any geometry, it would not update the detail number if updated. So, another temporary solution would be to ensure the depth of the elevation view touches or cuts through building geometry. However, I haven't had a chance for successful testing to ensure this is the case. Like Steve S., I too am on WU2, so I'm curious if others are experiencing this under WU1 or if on WU2, if you can verify that cutting geometry ensures the tags update correctly.