On Monday this week I spent about 4 hours cursing at elevation tags in Revit. Last I recalled, an elevation tag in Revit is supposed to update to reflect the detail and sheet info once placed on a sheet, no matter what. Well, not this time. I could change the detail number in properties for the elevation and it would show on the sheet and in properties as having updated, but the marker itself would not update. Steve Stafford posted a great video showing this. Steve S. found that changing the elevation type would cause the marker to update and display correctly.
I also found that the marker would resume displaying updates to the detail number on a consistent basis provided it cut building geometry. If the extents of the marker view depth did not cross any geometry, it would not update the detail number if updated. So, another temporary solution would be to ensure the depth of the elevation view touches or cuts through building geometry. However, I haven't had a chance for successful testing to ensure this is the case. Like Steve S., I too am on WU2, so I'm curious if others are experiencing this under WU1 or if on WU2, if you can verify that cutting geometry ensures the tags update correctly.
Showing posts with label Revit Architecture 2012. Show all posts
Showing posts with label Revit Architecture 2012. Show all posts
Tuesday, October 11, 2011

Tuesday, August 2, 2011
Revit Wall Generator
Tired of maintaining a wall library file?
Tired of generating one off wall types for a specific project?
Tired of having to verify if your wall meets structural, STC or fire rating codes?
Tired of users not creating walls that conform to your firm or industry standards?
If you answered yes to one or more of the above questions, then you will find the tool I've been beta testing of extreme interest. The tool is being produced by a metal stud manufacturer, but the implications are huge. ClarkDietrich Building Systems has named the tool ClarkDietrich BIM Wall Creator. They have even taken the effort of posting a YouTube video showing the basic work flow of their tool.
In essence, you start with the Wall Type Creator and design your wall with a certain end result in mind, namely: design your wall by height, sound rating or fire rating.

For item (1), this is where you build out the desired parts of your wall assembly. In the image above, we are looking to design a wall assembly by height. By changing the different components in the assembly (Web, stud o/c, deflection, lateral load & wallboard type/layers) we will be shown the corresponding product by ClarkDietrich that will be applicable for the choices made.
Item (2) shows the 3 choices available based on our design criteria. Selecting one of the heights listed at the far right is the next to last step.
Item (3) is the button to click which will create your wall type. It's a simple copy/paste once it's built out for you.
You will see something like the following once the wall has been built in Revit:

Where things really start to get interesting is the type properties. They are filled out so extensively and well it serves to address a number of things that an as built model in Revit would need to include. Creating walls in this manner is so fast it's not even funny!

The only drawback I see to this, is you are now specifying manufacturer specific content. That's great if you are using ClarkDietrich studs on your project. Not so great if you aren't. I'm sure that's what they are hoping though, to get specified into a project via the use of this tool. Also, it won't create other types of walls such as CMU, Concrete, wood stud and other types. That being said, its making me want to give the API another look and see if I can't make my own, generic version of this tool that address all wall types. Then again, maybe this type of tool is something Autodesk should provide ootb for Revit!
Tired of generating one off wall types for a specific project?
Tired of having to verify if your wall meets structural, STC or fire rating codes?
Tired of users not creating walls that conform to your firm or industry standards?
If you answered yes to one or more of the above questions, then you will find the tool I've been beta testing of extreme interest. The tool is being produced by a metal stud manufacturer, but the implications are huge. ClarkDietrich Building Systems has named the tool ClarkDietrich BIM Wall Creator. They have even taken the effort of posting a YouTube video showing the basic work flow of their tool.
In essence, you start with the Wall Type Creator and design your wall with a certain end result in mind, namely: design your wall by height, sound rating or fire rating.

For item (1), this is where you build out the desired parts of your wall assembly. In the image above, we are looking to design a wall assembly by height. By changing the different components in the assembly (Web, stud o/c, deflection, lateral load & wallboard type/layers) we will be shown the corresponding product by ClarkDietrich that will be applicable for the choices made.
Item (2) shows the 3 choices available based on our design criteria. Selecting one of the heights listed at the far right is the next to last step.
Item (3) is the button to click which will create your wall type. It's a simple copy/paste once it's built out for you.
You will see something like the following once the wall has been built in Revit:

Where things really start to get interesting is the type properties. They are filled out so extensively and well it serves to address a number of things that an as built model in Revit would need to include. Creating walls in this manner is so fast it's not even funny!

The only drawback I see to this, is you are now specifying manufacturer specific content. That's great if you are using ClarkDietrich studs on your project. Not so great if you aren't. I'm sure that's what they are hoping though, to get specified into a project via the use of this tool. Also, it won't create other types of walls such as CMU, Concrete, wood stud and other types. That being said, its making me want to give the API another look and see if I can't make my own, generic version of this tool that address all wall types. Then again, maybe this type of tool is something Autodesk should provide ootb for Revit!
Monday, August 1, 2011
Reflections on Testing and Setting up Revit Server
It occurred to me recently while talking with a colleague to make a blog post on some of the things I came across when going through setting up and testing Revit Server (RS). Hopefully this will help out others who are looking at implementing RS at their firm. I've made a post about Revit Server previously on my older blog which may be of reference, but already a few things on it have become out dated.
Testing on Revit spec Desktops
For starters and to get our feet wet, we setup 2 regular Revit spec desktop boxes with Windows Server 2008R2. One was the central RS and the other the local RS. Initial testing across the WAN was promising as save times dropped from minutes to seconds. When the average time for saves went from 7 minutes across the WAN for 180MB file done to around 30-45 seconds, I knew we had to get this going throughout the firm.
Expanded to Actual Servers
Now that we decided to implement this fully, we had to get our ducks in a row so to speak if we were going to place production projects into RS. We knew that for reliability, the setup needed to be on appropriate server grade boxes with redundancies built in that all servers should have, especially for the hard drive. Looking back, we spec’d out servers that are below the recommendations from Autodesk, but they have been working out so far just fine as we only have one active project going in it. If the use increases over time, then we will look at the need of whether or not the servers need to be upgraded.
File Backup for Disaster Recovery
We also verified that appropriate backup measures are in place. We are using Windows Shadow Copy 3 times throughout the day to ensure we have something ready in the event something is lost mid-day. Also, at night we employ a script per the RS Wiki site to place a server lock on all models andback up all files on a nightly basis.
Planning out Central vs Local Servers
We realized that we needed to establish early on which office location would serve as the central server as you can’t flip a switch and make a central server a local server. Also, we felt it would be an IT administrative nightmare trying to establish multiple offices with central servers. We decided on making our office with the largest head count the central site. All other office locations will be local servers pointing to it. We felt this was appropriate because the majority of work is carried out in this location and it has the largest bandwidth for handling connections to outside locations. Connection bandwidth will have an effect on your experience with RS too. If it’s not fast enough, you can end up with corrupt models or models failing to access the central properly.
What needs to be installed for local/server systems
For local systems, getting ready to use RS will vary depending on the version of Revit you are dealing with. As detailed in myprevious post, Revit 2011 needs the following components installed: Web Update2, Subscription advantage pack 2 (link takes you to sub ctr), RS client app (link takes you to sub ctr), Project Bluestreak and RevitActivity Stream (more on these last two will follow). For Revit 2012, all you need is Project Bluestreak and Revit Activity Stream. Its recommended though to ensure Web Update 1 for 2012 is installed as it provides a number of stability enhancements when working with RS.
For server systems, you will want to ensure Windows Server 2008R2 is up and running along with IIS. Then, setting up RS is pretty much a breeze via the install wizard found on your Revit installation disk or downloaded files (it's been noted by Autodesk to not extract the files for RS install from the main Revit install setup). The latest recommendation from Autodesk is to install RS 2012, update1. I can confirm this is the desired tool as we were having issues with RS 2011. One thing we did once we got one local server setup was we imaged the setup, then ghosted it onto the other local servers, changed the box and local server name and had a really quick setup.
Security issues
The biggest hurdle I had to overcome was when I said to IT that we needed to install Project Bluestreak (BK) for anyone using RS. BK requires certain ports to be open in order to allow it to communicate through Autodesk servers. These ports happened to be the same ones they had blocked for IM apps like AOL AIM. I was able to convince them that this was the only way to have automated messages display when people were STC.
The other thing we did was set only certain people to have access to RS. There are 2 ways you will want to have access setup. You will want to limit the number of people that can access any of these areas to minimize the risk of someone accidentally messing with files they shouldn’t. The RS admin panel operated via Windows Internet Explorer can be set so that only certain users can access it in order to set model locks for maintenance. Also, Windows Explorer should have 2 paths opened to allow access to the physical files. One goes to the location where the model data is stored and the other goes to the log folder for RS as both of these locations will need to be accessed in the event you need to send files to Autodesk if there is a problem. This applies to both the central and the local servers.
Stability issues
It would seem that RS 2012 update 1 has fixed many of the problems we were experiencing with RS. RS 2012 update 1 will work with both Revit 2011 and 2012. Things like model locks, where no one could save to central would randomly occur or the local files for users would become disassociated from the central. It seemed these issues were occurring once a week for a while. Still, even with the occasional issues we were having in RS 2011, the team estimated they were saving about 12 hours a week for 3-4 people working on the project. Now that we seem to be done with file locks and disassociated local files, productivity should increase even more.
Collaboration
As mentioned earlier Project Bluestreak (BK) is required for automated communication of actions such as STC. Earlier on there was a lot of communication interruptions due to working out server port issues and some bugs Autodesk was working out on their side. It seems that most of that has been worked through now.
Also, you will want to ensure that if in the event the team is comprised of people only in remote offices, that you have a support person or computer you can remote into at the central office location. You will want this if you need to place a model into RS. It can’t be done safely over the WAN and in order to ensure the model does not go corrupt, you need a local system in the central office for that.
The other thing to think about is that RS only hosts Revit models. You cannot place other files into it that you might normally link into a Revit model such as dwg files. You will want to make this clear to the team that the model will no live in a different place than the project. Also, when you go to send the file to other trades, you need to open the central with detach from central selected, otherwise, if they don’t have RS setup, they won’t be able to use the file. So plan for a little extra time for that.
Next steps
Now that we have it running smoothly for one project we will be opening it up to other projects that utilize teams from different offices. If this continues to scale smoothly, we will start looking at the possibility of building a DMZ to allow other trades to work on projects on the same server. That probably won’t be able to happen for testing until next year though.
Tuesday, June 21, 2011
Revit 2012 Subscription Extensions are out...
Just wanted to help spread the word that the 2012 Subscription Extensions are out now for all 3 Revit 2012 flavors. You can see from Kathryn's post what is included in each version here: Revit Clinic
Monday, June 13, 2011
Kelar Pacific 2012 Product Launch Event
On Thursday of last week I attended the Kelar Pacific 2012 Product Launch Event. This event was great and very informative showing what the Autodesk 2012 products have to offer. One of the things that made it great was that it felt like it was a one on one session with the presenter and me. It was very interactive which allowed for a more free flow of info.
Derek Renn presented what's new in a few different platforms and started with AutoCAD 2012. He pointed out an interesting use for the new Content Browser in that it could potentially be used to index a master standards file and allow you to easily populate a working file with content from the standard. Since it will index all objects inside and outside of a dwg file, the search potential is huge! I made a note to double check on my deployment image to see if we can configure in advance the folders to watch for indexing and to enable indexing for both private/public locations which allows searching across the drives on the server.
Derek next presented what's new in Revit Architecture 2012. He started off with Part & Assemblies and made a few points on applying these features to Architectural workflows. One way was to break floors into parts using grid lines which would ease in creation of the floors. Also, walls can be broken into parts for interacting with structural model or for QTO purposes. Even more exciting is now that we can break elements into parts, we can 4D sequence elements in Navisworks much more easily now. Lots to explore and play with there. One last thing he pointed out is that you can now apply view templates to 3d graphic display options. Yeah!
Lastly, Behzad covered Navisworks Manage 2012 in depth on its new features after wrapping up Revit Structure 2012. One feature I really appreciated is the ability to "Group" clashes. Say you have a steel beam with multiple ductwork cutting through it. In past versions, you would have to deal with multiple items, now you can place them in one group (think: folder) and find every related issue. Of note was the ability to use Switchback with Revit now. YES! Also, you can now assign people to clashes and have this show in the report to help with tracking who's fixing what. Then, when exporting be sure to choose HTML Tabular as this will make a clean export (instead of creating and export folder to place everything in), as well as allow you to open it in Excel. Lastly, Navisworks can now open 2d/3d DWF files. If its a 3d DWF, it should allow clash detection with other model objects.
I didn't stay for the whole event as I got what I needed out of the sessions I mentioned above. They were ready to present Revit MEP, AutoCAD MEP and Civil 3D whats new as well, but not sure if they were covered or not. Kelar provided a great lunch, nice informal atmosphere and some great insights to the 2012 products from Autodesk. More goodies to stick in the hat and make use of here at work.
Derek Renn presented what's new in a few different platforms and started with AutoCAD 2012. He pointed out an interesting use for the new Content Browser in that it could potentially be used to index a master standards file and allow you to easily populate a working file with content from the standard. Since it will index all objects inside and outside of a dwg file, the search potential is huge! I made a note to double check on my deployment image to see if we can configure in advance the folders to watch for indexing and to enable indexing for both private/public locations which allows searching across the drives on the server.
Derek next presented what's new in Revit Architecture 2012. He started off with Part & Assemblies and made a few points on applying these features to Architectural workflows. One way was to break floors into parts using grid lines which would ease in creation of the floors. Also, walls can be broken into parts for interacting with structural model or for QTO purposes. Even more exciting is now that we can break elements into parts, we can 4D sequence elements in Navisworks much more easily now. Lots to explore and play with there. One last thing he pointed out is that you can now apply view templates to 3d graphic display options. Yeah!
Lastly, Behzad covered Navisworks Manage 2012 in depth on its new features after wrapping up Revit Structure 2012. One feature I really appreciated is the ability to "Group" clashes. Say you have a steel beam with multiple ductwork cutting through it. In past versions, you would have to deal with multiple items, now you can place them in one group (think: folder) and find every related issue. Of note was the ability to use Switchback with Revit now. YES! Also, you can now assign people to clashes and have this show in the report to help with tracking who's fixing what. Then, when exporting be sure to choose HTML Tabular as this will make a clean export (instead of creating and export folder to place everything in), as well as allow you to open it in Excel. Lastly, Navisworks can now open 2d/3d DWF files. If its a 3d DWF, it should allow clash detection with other model objects.
I didn't stay for the whole event as I got what I needed out of the sessions I mentioned above. They were ready to present Revit MEP, AutoCAD MEP and Civil 3D whats new as well, but not sure if they were covered or not. Kelar provided a great lunch, nice informal atmosphere and some great insights to the 2012 products from Autodesk. More goodies to stick in the hat and make use of here at work.
Thursday, June 9, 2011
Review of 3D Connexion Space Explorers
The results are in. Last April, we started a trial of 3D Connexion devices in several of our offices - specifically the Space Explorer model. It seems as if the feedback is split down the middle. It seems people either love 'em or hate 'em. We found in our testing that changing the factory defaults for the different axes was absolutely critical. Specifically, disabling the roll axis seemed to be of benefit to a number of designers. We used it in Sketchup, Bonzai, Rhino, 3ds Max Design and of course Revit.
We've come to the conclusion that while for some it can be of benefit, it would be hard to justify placing one on everyone's desk. We also felt it would be of particular benefit while doing live presentations of models in Sketchup/Revit to interested parties as it provides a much smoother navigation as opposed to the usual keyboard/mouse method. One thing a few designers liked was the beta driver software found on their dev site (version 3DX10). Its nice to be able to control pan/zoom in Photoshop and scroll in other documents. Lastly, we tested on both PC and Mac platforms and things seemed stable. One thing we didn't get into though, was assigning macro's to buttons since we didn't have the "Pro" mouse. I can see some potential for that, however it will have to wait.
I'd like to give a big thank you to 3D Connexion for allowing us to demo these devices to prove their worth. We will definitely be investing in these in the near future.

We've come to the conclusion that while for some it can be of benefit, it would be hard to justify placing one on everyone's desk. We also felt it would be of particular benefit while doing live presentations of models in Sketchup/Revit to interested parties as it provides a much smoother navigation as opposed to the usual keyboard/mouse method. One thing a few designers liked was the beta driver software found on their dev site (version 3DX10). Its nice to be able to control pan/zoom in Photoshop and scroll in other documents. Lastly, we tested on both PC and Mac platforms and things seemed stable. One thing we didn't get into though, was assigning macro's to buttons since we didn't have the "Pro" mouse. I can see some potential for that, however it will have to wait.
I'd like to give a big thank you to 3D Connexion for allowing us to demo these devices to prove their worth. We will definitely be investing in these in the near future.

Tuesday, June 7, 2011
U.S. CAD Solution Tour for Autodesk 2012 Products
This morning I attended the U.S. CAD Solution Tour for Autodesk 2012 Products (aka Make Your Ideas a Reality per Autodesk speak). Overall it was a very well put together event showcasing live what the 2012 building products from Autodesk have to offer.
The first session highlighted KaDe King, their resident AutoCAD expert who deftly showed some of the great new features in AutoCAD 2012. Items she covered were the new Content Browser, Auto-Complete for commands, new functions for Grips, being able to select/manipulate the UCS icon (my personal fav), the drastic increase in the ability to import more file formats, the parametric Array command and adding dynamic views to sheets.
The expert panel from the U.S. CAD building team brain trust went in action (photo below) with a couple guest speakers - Scott Davis from Autodesk and Lonnie Cumpton from BIM9. William Troeak presented some of the general Revit Arch 2012 new features. William showed some of the great new presentation features for 2012 with the surface ghosting and new paint tools along with tagging/annotating in 3d. One great little tip he pointed out was that if you place regular text in your 3d view, if it is ever unlocked, the text will not hide with the other annotation objects (such as tags).

William was followed by Lonnie presenting new features centered around the new worksharing capabilities. Lonnie has unique qualifications to talk about the impact of worksharing enhancements after having worked on the Cosmopoliton in Las Vegas. After completing the project in Revit at about 7.5 Million Sq Ft and 47,000 sheets in the completed CD set, he's gained a little experience from it. In addition to covering worksharing enhancements such as the ability to remove worksets when detaching from central, he also showed a few ways for color coding them. You can color elements based on who has an items checked out or per the workset they belong to (great for seeing who has item checked out or ensuring all objects are in the correct workset). It was pointed out that the refresh rate can be set to update as frequently as every 5 seconds.
Up next was Dawn Hata covering Revit Structure and Michael Shinn covering Revit MEP. Dawn pointed out that we can now set VG to control and easily turn off the Revit Structure Analytical model with greater ease. Repeat after me: "I will go update my view templates now". Once all the Revit flavors were covered, Joel wrapped up by presenting Navisworks Manage 2012 and I owuld say the highlight was the ability to place objects into a shaded view with wireframe active, greatly enhancing the ability to view collisions in 3D. Lastly, I would like to say that it was refreshing to see the entire team utilize ONE building model design in each of the different software packages.
After the first session, everyone broke out into separate rooms, one for a presentation on Siteworks for Revit and the other on BIM9. Siteworks for Revit shows great promise in easily modifying site features and related info directly in Revit. BIM9 essentially allows you to setup your own private BIM cloud for accessing Revit projects remotely. Trust me, it works wonderfully!
All in all it was a great event and it was great to see some industry friends. Now to go get some of these tips in the hands of users throughout the company!
The first session highlighted KaDe King, their resident AutoCAD expert who deftly showed some of the great new features in AutoCAD 2012. Items she covered were the new Content Browser, Auto-Complete for commands, new functions for Grips, being able to select/manipulate the UCS icon (my personal fav), the drastic increase in the ability to import more file formats, the parametric Array command and adding dynamic views to sheets.
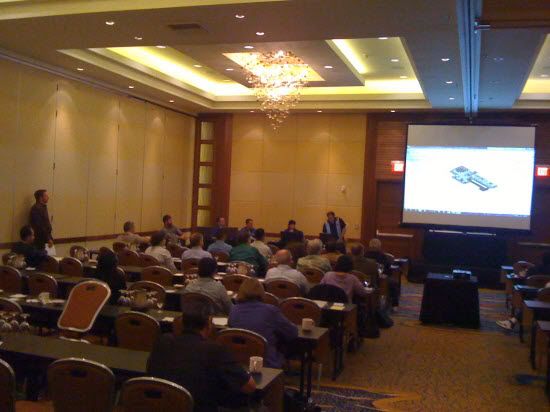
The expert panel from the U.S. CAD building team brain trust went in action (photo below) with a couple guest speakers - Scott Davis from Autodesk and Lonnie Cumpton from BIM9. William Troeak presented some of the general Revit Arch 2012 new features. William showed some of the great new presentation features for 2012 with the surface ghosting and new paint tools along with tagging/annotating in 3d. One great little tip he pointed out was that if you place regular text in your 3d view, if it is ever unlocked, the text will not hide with the other annotation objects (such as tags).

William was followed by Lonnie presenting new features centered around the new worksharing capabilities. Lonnie has unique qualifications to talk about the impact of worksharing enhancements after having worked on the Cosmopoliton in Las Vegas. After completing the project in Revit at about 7.5 Million Sq Ft and 47,000 sheets in the completed CD set, he's gained a little experience from it. In addition to covering worksharing enhancements such as the ability to remove worksets when detaching from central, he also showed a few ways for color coding them. You can color elements based on who has an items checked out or per the workset they belong to (great for seeing who has item checked out or ensuring all objects are in the correct workset). It was pointed out that the refresh rate can be set to update as frequently as every 5 seconds.
Up next was Dawn Hata covering Revit Structure and Michael Shinn covering Revit MEP. Dawn pointed out that we can now set VG to control and easily turn off the Revit Structure Analytical model with greater ease. Repeat after me: "I will go update my view templates now". Once all the Revit flavors were covered, Joel wrapped up by presenting Navisworks Manage 2012 and I owuld say the highlight was the ability to place objects into a shaded view with wireframe active, greatly enhancing the ability to view collisions in 3D. Lastly, I would like to say that it was refreshing to see the entire team utilize ONE building model design in each of the different software packages.
After the first session, everyone broke out into separate rooms, one for a presentation on Siteworks for Revit and the other on BIM9. Siteworks for Revit shows great promise in easily modifying site features and related info directly in Revit. BIM9 essentially allows you to setup your own private BIM cloud for accessing Revit projects remotely. Trust me, it works wonderfully!
All in all it was a great event and it was great to see some industry friends. Now to go get some of these tips in the hands of users throughout the company!
Subscribe to:
Posts (Atom)