Wednesday, September 27, 2017

3D Connexion Wireless CAD Mouse

It may of taken 2+ years for 3D Connexion to release a wireless version of their wired CAD mouse, but they've finally done it! They released the new wireless version on Tuesday September 19th 2017, I ordered it the same day and received it Saturday of the same week via FedEx Ground (free shipping option). Needless to say, I was fairly excited to get working with it. Over the last couple years, I've grown very accustomed and attached to my wired CAD Mouse. Its fits really well in my hand and I really love having that dedicated middle mouse button. Anyways, onto the new device!

Notes:

  • Fit and finish of product box is on par with a new iPhone product box, well packaged, protected and great graphics to get going quickly.
  • The carry case for the mouse was in its own bag to protect from any scratches.
  • The inside of the carry case is padded on the side that goes against the buttons, nice touch.
  • On the bottom of the mouse, there is an on/off switch, a pairing button and one to switch between the dedicated hardware dongle and Bluetooth.
  • The wireless CAD Mouse is slightly smaller than the wired version, something I wasn't expecting. Initially, I wasn't happy about this, however, I think I will get accustomed to it, seems to be approximately 10-15% smaller overall.
  • I also got the new, smaller mouse pad which seems to be more of a traditional size and fits better for me in a lot of spaces I set up my laptop. Yes I actually use the pad they sell, I've actually had a few issues on semi-reflective issues and getting the mouse to behave correctly. It also seems to glide better on this pad than on others. Plus, it makes that cool fake thunder sound when you hold the pad and wiggle it back and forth in the air. =)
  • Having used it for about 3 days, I'm really loving the lack of a wired connection. By the second day, I needed to plug it in and use it while charging via the included USB as it was lagging a bit on inputs. Unplugged the next morning and its back to being very responsive.
  • Price might seem to be a little higher than your average wireless mouse, however I feel the value is there for the price. High quality construction, well thought out design and a very good sensor for precise picks and clicks.


Friday, May 19, 2017

Tap, Tap, Tap... Is this thing on?

Looks like it is. It's been far too long since I put an update out here. I've been fairly busy with work. Last year I earned my FAA Remote Pilot Airman certificate to fly sUAS (drones) commercially in addition to the typical stuff during the day. The reason I earned my Remote Pilot license was to support the companies need to fly a drone legally for projects. In this process, I've developed workflows for the safe and effective use for drones commercially and developed workflows to successfully utilize the data captured. I'll be presenting some of these efforts at AU this year, if my class is chosen.

Would you vote for my class? If so, please head over to here:
http://au.autodesk.com/speaker-resource-center/call-for-proposals/voting
Search for the term "Fly High!" in the search box.


Wednesday, June 10, 2015

I'm in love with my new 3D Connexion CAD Mouse!!!!

My new 3D Connexion CAD Mouse arrived today!!!! In a nutshell, after using it for just a couple hours, I'm never going to use another mouse again! The single biggest win for this device? A dedicated middle mouse button for panning in viewports.

After I unboxed it (nice packaging too), I downloaded the driver, installed, plugged the mouse in and found a reboot is required. One of the first things I noticed after unboxing it is the USB cord. It is advertised as a braided cord, however in person, looks more like a rope to me and seems out of place on a typical office desk. I like it though! Its cord length should be long enough to head under the desk for those that like their computers out of sight. Its lightweight too, it feels lighter than it should for having that metallic type finish around the base of it.

Once my reboot completed, I immediately sensed a noticeable change in on screen movement of the mouse cursor. It's hard to describe really, more my perception than anything, however it does seem easier to point to a specific object. The buttons seem easier to click and my initial reaction on the middle/right buttons is that it is going to take some getting used to - especially with finger placement (more on this in a moment). The size of the mouse is on par with the Logitech M/N M-U0007, only wider in the mid-body and toward the front. The Logitech mouse allows most of my hand to rest on it with my pinky finger and half of my ring finger hanging off. The old Dell mouse I had been using (M/N M-BAC-DEL5) is even narrower than both the Logitech and CAD Mouse, resulting in half my hand resting on the mouse and 2 fingers hanging off. The wider CAD Mouse design resulted in the whole width of my hand resting on the CAD Mouse and only my pinky finger hangs off the side of it which is just enough to grip it adequately.

The Gesture button does take some effort to click due to its placement on the mouse, yet offers immediate shortcuts in general Windows interface and typical MS Office apps. Things like opening your default browser, copy/paste, top/bottom of page, etc. are all found on the Gesture menu. The cool thing is that it only takes one click to use - click the Gesture button, then slide your mouse in the direction of the command you want which will then activate it without clicking. When the Windows Desktop has focus, Gesture button can access the CAD Mouse properties.

Always one to explore configurations, I found I needed to make an immediate change to default settings. I'm not sure why the CAD Mouse precision defaulted to a Sensor Polling Rate of 250Hz when product is advertised as capable of 1000Hz sampling. After adjusting this to 1000Hz, I felt I needed to increase my default speed settings slightly to match the enhanced sampling rate.

Now that I felt I had a handle on the settings of the CAD Mouse, I decided to give it a shot in Revit.  I noticed the Gesture button has different application specific gestures - I need to look into these more after getting more accustomed to the mouse. Zooming with the scroll wheel is grippy from any non-ergonomic angle and immediately noticeable on how easy it is to scroll. One thing with recent mouse design that drives me bonkers is their tendency to have the ability to roll the wheel left/right in addition to forward/backward. This has been disastrous in my opinion to having a scroll wheel work well as a Pan tool. After 5 minutes using it in Revit, OH MY GOODNESS I DON’T HAVE TO PAN WITH A WHEEL ANYMORE!!!!!!!!!!!!! Getting used to middle mouse button for Pan should take about 5 minutes or less… I can't describe how great it is to be freed from using a wheel to Pan and just use a regular button. It takes me back in time more years than I care to admit, when mouse design was simpler and not driven to appeal to the masses of internet users.

The icing on the cake, so to speak is that I also got the CAD Mouse Pad from 3D Connexion along with the mouse. This is a great, high quality mouse pad. Its also BIG - almost 3 times as big as my old mouse pad (approximate dimensions: old 7.5"x7.75"@58sqin & new 9.75"x13.75"@134sqin). I'm sure they intended it to be placed long side facing me (think widescreen), but then it gets in the way of where I have my laptop docked so I've got it oriented vertically (think vertical video syndrome). Either way, its still way bigger than my last mouse pad - RIP CAD Monkey. The surface provides a seemingly friction-less surface and has a nice rigidness to it which could allow me to mouse on the sofa if I wanted to.

In summary, the two things I love the most on this CAD Mouse are the extra grippy scroll wheel & the dedicated middle mouse button. I do wish it had a wireless option and that the Gesture button wasn't so far back on the device. Otherwise, everything else is just an added bonus that adds up to something more that the sum of its parts. I look forward to using it in more applications too such as AutoCAD & 3ds Max. I have to admit that I was skeptical about it based on its price at first. Now after having spent some time with it, I have to say I would easily justify its cost. I've attached some of my pictures I took to this post, for more info such as detailed specs, pricing and more, head on over to: http://www.3dconnexion.com/products/cadmouse 

CAD Mouse


CAD Mouse Pad


Tuesday, December 9, 2014

Autodesk University 2014 : It's a Wrap!

74,000 plus steps - more than 21 miles walked this year at AU. Multiple classes, business meetings, great keynote sessions, a real life hoverboard and more made up for a great AU.

For me, the class highlight was seeing an entire train maintenance yard modeled in Revit. Rails, ties, utilities, structures, signage and more was all done in Revit. Great tips for challenges encountered along the way. Check out the class if you can! CV5504-P Case Study for a Civil-Based BIM Project Using Revit

The keynote highlight had to be the hoverboard. As a kid, Back to the Future II hit a sweet spot for me and I grew up wishing I had one. Now they are real! Well, difficult to obtain and challenging to find a surface to ride them on but definitely real! Check out HendoHover for more info.

Now I need to bring together the ideas found into the everyday workflow our projects see, should be a fun 2015 lurking right around the corner!


Tuesday, January 28, 2014

The Dilemma of Multi-Building Campus Projects and Similar Details in Revit

If you've worked with Revit for any length of time and have been on a project with multiple buildings, I'm sure you've realized that each building will likely have similar details between them. If the documentation sheets are kept in each building, you soon realize that you are going to have duplicate details in each project to manage. In the past with other software platforms, you could simply link in each detail multiple times and be done with it. In Revit, the project tends to bog down with multiple links of individual details and linking in one project with many details doesn't help.

I've seen some creative ideas to get around this dilemma. One method involved creating a separate project with floor plans having multiple Dependent views cropped to individual details. Then, linking in this project to each individual building and creating more views you could start to reference details that are similar.

Another method is to link each building into a master site project and create all documentation in this master project. Depending on the size, this method can become sluggish as well. It also requires you to have views setup in advance in each building for reference in the master. Also, you inevitably have 2 copies of Revit running simultaneously for both the master site and individual building file. Again, more duplicated work.

What if I told you we could have the best of both worlds when it came to these details? If you haven't heard of Revolution Design, allow me to introduce you to a tool they have which solves this dilemma.

Revolution Design's - Revit Worfklow "autoLink"
This tool has the potential to save your team a lot of time and headaches.

Example:
Project model A = One of our buildings on a campus
Project model B = Our master set of similar details shared by each building

Using Workflow with it's autoLink function, I've built a detail bubble that will be placed in "A". The autoLink tool will allow me to place this special bubble. Next, I link into model "A", model "B", without needing to show it in any views. Finally, I'll type into the autoLink detail bubble, the detail number and sheet number of the corresponding detail from "B". When I tell autoLink to update linked references, the detail bubble is linked up with the corresponding view from "B". Using the detail view reference ID, if the detail number or sheet number for the view in project "B" ever changes, the bubble in "A" will be updated as well. Now, I can setup sheets in "A" as place holders for the sheets in "B".

I'd recommend you check out this tool! There are other more obvious uses for autoLink too, this just happens to be the obscure use for it. Revolution Design makes some other highly useful tools as well that are worth taking a look.

Tuesday, January 14, 2014

Finding Something Positive - Everyday

It's so easy to lose sight of the things that really matter - especially if things don't go the way we would hope. I know we all face something everyday that can cause us to feel the day was completely wasted. Why not flip things around? Why not spend your day looking for the best thing that happened instead of grumbling about the bad thing that happened?

My cousin is looking for something positive everyday and blogging about it each time. Since she works as a nurse, she sees plenty of things most would rather not face, everyday. Yet she is finding something positive everyday. If you are looking for an encouraging read, check out her blog: A Positive 365!

Wednesday, December 18, 2013

Benchmarking the NEW BOXX LEGO Workstation and RenderPro

Earlier this month at Autodesk University, I had the opportunity to obtain the latest offering from BOXX - their new LEGO Workstation and Lego RenderPro. I could hardly wait to get these two systems built and benchmarked and share the results with everyone. Well, the results are in and these are the fastest systems with the most performance per dollar you can get in the LEGO world. I have to admit, I've never been able to assemble a LEGO kit as quickly as I did with these two. I hope you enjoy my review of these limited edition systems from BOXX and NO you can't have these - I've already gifted them to my kids!

In my testing, I found that I needed to miniaturize myself in order to get the full appreciation of the Workstation and RenderPro. Here you can see me basking in the full glory of the immense Workstation:


You'll note that just like other systems they offer, there are plenty of USB ports on the front - 4 for the Workstation and an extra on the RenderPro. Standard power on and HDD function LEDs on both units along with Power & Reset Buttons.


On the back of the Workstation, things get fun. A total of TEN Expansion slots, Dual Ethernet ports, another 4 USB ports and more that are too small to make out what they are... The RenderPro has Dual Ethernet ports and another 2 USB ports. You can see me eagerly applying the front face decal in this photo to the RenderPro.


Here you can see me taking a quick stroll across the top of the RenderPro after its been docked with the Workstation. Together they make a formidable foe that will render any LEGO scene faster than you can say Minecraft!


I also wanted to give everyone a sneak peak inside the Workstation to show you how cleanly assembled it is and easy to work on should you want to utilize those expansion bays. Despite the thick walls of the LEGO chassis, I found it incredibly easy to work on. You can clearly see they spared no expense on this liquid cooled, overclocked XEON CPU. Given that there are SIX stickers on the Workstation and FIVE on the RenderPro, that counts for an extra 55 Horsepower total above the overclocked 4.5GHz if you count 5HP per sticker. I have to say I was very impressed with these two systems and would like to thank BOXX Technologies for the opportunity get hands on time with these special systems.

Every other LEGO computer system you could buy is just a complete BRICK.

Monday, November 18, 2013

Islands of the Pacific and Other Far Off Places

Mauritius, French Polynesia, New Caledonia - thanks for visiting! It's great to see such a diverse international audience that comes to visit this blog. It would be great to hear back from you with any efforts of BIM in your area. Feel free to drop a note in the comments or touch base with me via twitter or linked in.

Friday, June 28, 2013

Are You Brave Enough to Ask for Feedback?

I've been doing a lot of Revit training for the company I work at this year. I did plenty of training when I worked previously at U.S. CAD and at the conclusion of every class we always had the students fill out a survey. Sometimes the feedback was uplifting, other times it was a wake up call. It takes a certain mindset to process feedback from others on something you spend a lot of time doing and have put a lot of energy into. To put it to use is another thing all together.

After a few class lately, it occurred to me that I had no way of really knowing what those who attended thought about what they just learned and how it was delivered. So, I put together a brief survey for each different topic via Survey Monkey and started passing them out. I got some really good comments back already, albeit in a limited fashion. I think I am going to start requiring attendees to fill out the survey before they leave at the end of the class so I can get better participation in the survey's.

So, would you ask for feedback?

Wednesday, April 24, 2013

Specifying a Computer to run Modern Design Applications

Much discussion surrounds system specs for running modern design applications. I've made previous posts about system specs (wow that's old!), Jay Zallan has done so recently, but I have a slightly different take on it now after my recent benchmark tests. To make it simple there are 5 main things to consider when spec'ing out a system, something I've touched on previously. I've listed them here in order of importance.
  1. OS
  2. CPU
  3. RAM
  4. Video/Graphics Card (GPU)
  5. Hard Drive
The tough part comes when trying to spec a system for a user. Do you spec one configuration only that covers the majority of needs or have multiple ones depending on a users focus? A designer might be more concerned with running Adobe products, Rhino, Sketchup and Revit early in the project. A sustainability expert would be running still different software while someone wrapping up construction documents would be spending a majority of their time in Revit. Until recently, we have been specifying one spec for all positions, one that can handle large Revit projects with ease.

The thing I noticed with my recent benchmarks testing Revit is that it did not benefit as much from an expensive GPU as I previously thought. Also, I found that steps taken that should benefit from a SSD did not produce as much benefit as I'd hoped. When it comes to OS, you better be on a 64bit platform or most of the rest won't help you.

If you are on a tight budget like I am and trying to get the most benefit for your money, I would go with the fastest CPU you can get as that seems to drive the most benefit for productivity. Next, add as much RAM as you can get, starting with 16GB minimum as Autodesk recommends.

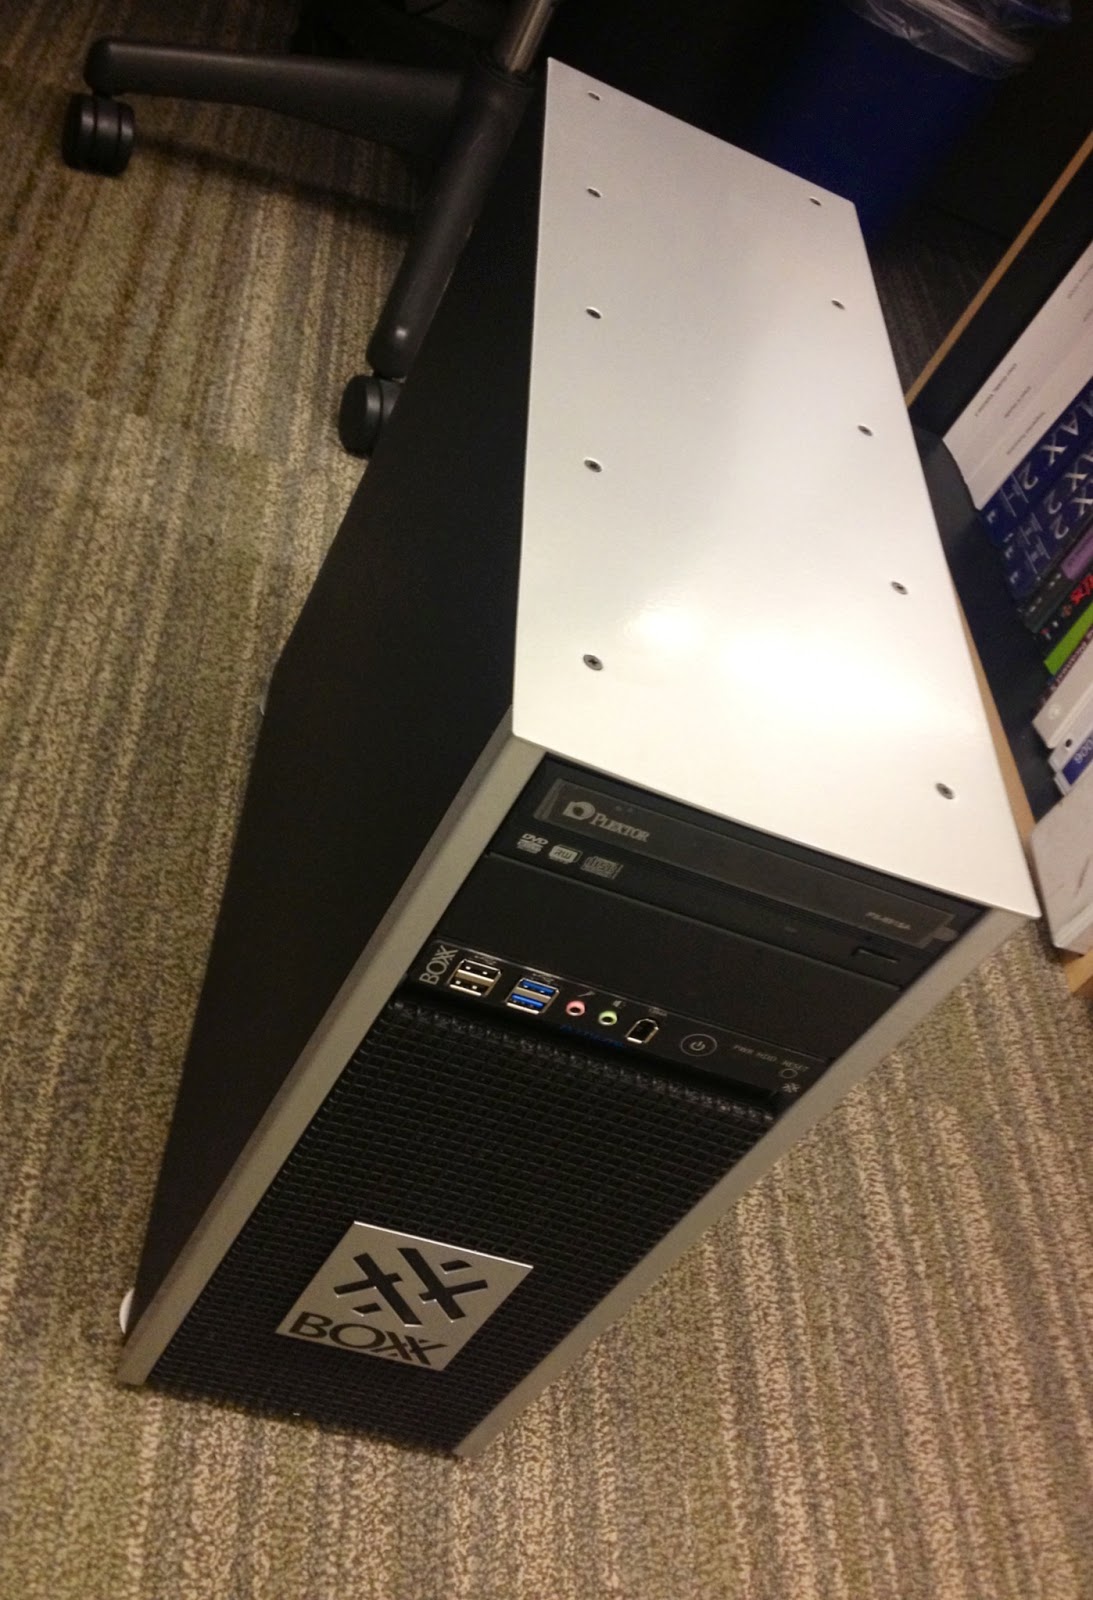
As for a GPU, Revit did great on my benchmark tests with a mid-range card, the Quadro 600. The jury is still out on what happens with it in other applications like 3ds Max, Rhino or Sketchup. Initial experiences from our in house 3ds Max expert Chris Grant said he felt that viewport performance was very snappy, more so than his desktop running a Quadro 4000 with dual Xeon CPU's. We need more testing in other applications, but I predict the Quadro 600 will suffice for them as well. My thought is that because on our BOXX 4050 & the CPU was running overclocked, the CPU was able to hand the data off to the GPU faster for it to process things.

When it comes to hard drives, there are a few things to consider. If you are running a regular physical hard drive (HDD), RPM of the disk speed as well as transfer rates from disk to CPU/RAM affect how fast data can be read/written. You can get some pretty high RPM drives these days for HDD. I noticed on the spec sheets from BOXX that their system with a HDD running @ 7200RPM had the same transfer rate as their SSD. Getting to the data is one thing, sending it around the computer is the other part. I need to run more testing on a similarly configured BOXX with a Solid State Drive (SSD) to confirm my suspicion, but I would have to guess that running with a HDD vs SSD does not offer the performance boost when using Revit that one would hope for.

When does Revit access the hard drive? Per the Revit Model Performance Technical Note, it is only during model load, model save and any hard disk swapping managed by the Windows OS.  What is hard disk swapping? According to this page on Wikipedia, it is part of virtual memory (VM) implementation in the operating system that allows disk storage for data that does not fit into physical RAM. So to me, I interpret that to mean Revit only uses VM if it runs out of RAM. If you have enough RAM, you shouldn't need VM with Revit. This in turn means Revit only really accesses the hard drive when you first open a model and when you save / sync with central. Overall, this is a far less occurring activity during the day and for only short bursts compared with model creation/editing and viewport regeneration. Also, with many large models, they are central files and a good amount of that save time is sending data to/from the server over your network. So I guess that's a long winded way of saying I don't see the benefit from the added cost of a primary SSD. I'm not saying it won't speed things up here and there, I'm just looking at the overall picture of trying to get the most value for my money.

In summary, I can't stress enough that you need to spend as much of your budget as you can on the fastest CPU you can get your hands on. It will just make life so much more productive and pay for itself much faster than other bits you might splurge on. If I had a rich uncle give me a bag full money to go buy whatever desktop I wanted, it would have the fastest CPU (multi-socket/multi-core), best dual GPU setup with a couple SSD's and as much RAM as I could stuff into it. Until then, I'll squeak by with a fast CPU and get by with lesser components elsewhere.

Monday, April 8, 2013

Benchmarking the 3DBOXX 4050 XTREME vs Dell T3600

Well, the numbers are in and I have to say that I'm very happy where they landed! In short, I would be looking at a 28% productivity boost to run the BOXX 4050 instead of the Dell T3600. In my previous post, I mentioned the specs between the Dell T3600 & the BOXX 4050 Xtreme. I've since updated that post slightly to more accurately reflect the T3600 specs that we use. Now for some numbers breakdown.

The Benchmark Tests
I have to give credit to RevitForum.org for their posting an updated version of the original AUbench Revit journals and updating the scripts to handle the new versions of Revit. You can download a copy of the same benchmark tool I used (If not a current member you'll need to signup, its free). This benchmark allowed great consistency and automated the majority of testing between systems and versions of Revit. I also ran this benchmark on a couple laptops we have and some of our older systems to get some historical context as time marches on. I also kind of wanted to see how the gap increased the father back we went on T3500 & T3400 models we have floating on the floor. Each machine and each version of Revit ran the benchmark tool 3 times to ensure I could get a fair average.

I also performed some manual tasks on both the T3600 & the 4050. It consisted of working with a Revit 2011 model that was 495MB in size. I took the model and timed the tasks of upgrading it from 2011 to 2012 and then to 2013. Other things were done and timed and noted. One thing to note was that the upgrade from 2012 to 2013 took a long time, much longer than I expected on both systems. Something to watch for as projects are upgraded.

Items of Note

  • As each version of Revit progressed, things took slightly longer to complete, as shown in the total averages below.
  • Many tasks I previously thought of as something being driven by the GPU are still handled by the CPU. For example, the benchmark measures time it takes the viewport to regenerate with Hardware Acceleration (HA) both on and off. However, between the 2 systems, the T3600 has a better video card than the 4050. So I expected the tests with HA on to run faster on the T3600 than on the 4050. However even with a lesser video card, the 4050 still outperformed the T3600!!! This proves that even though view regeneration should be handed off completely to the GPU, the CPU still processes much of the data. Therefore money spent on a faster CPU will go farther than a fancy GPU.
  • My laptop I use that was purchased 2 years ago with a SSD primary HD, nice video card and 1.73GHz i7 CPU got spanked by a new, midrange laptop handed out to Project Managers in Model Creation and Rendering. However, it's on-board graphics card was no match for my Quadro 2800M, my laptop owned it in those tests. So, there is some credence to having some kind of a graphics card and not relying solely with an on-board GPU integrated into the motherboard. This confirms what I have felt over the time of using my laptop, the SSD doesn't offer as much of a boost in performance as I'd hoped. Put the money in the CPU!

In Conclusion
I know what you are thinking - "How do I convince management/purchasers/IT to switch to BOXX from their cherished status quo?" I've found that you can throw graphs and percentages and "everyone else is doing it" until you are blue in the face. What really gets them is cold hard cash. How much $$$$ will the company save if they use this new desktop that costs more than the status quo?


The steps taken in the benchmark tests represent things that would be done many times throughout the day, but for arguments sake, let’s say a person doesn't spend all their time using Revit. In fact, I’ll go out on a limb and say we can only apply the increase in speed over the T3600 once per day for an hour. Let’s run that number out over the course of a year and say the persons billable rate is $75/hour (just a guess for a position that involves heavy use of Revit).
$75/hour * 250 working days per year  = $18750

This means that if the BOXX runs 28% faster than our T3600, we would save about $5250 per year on salary as we could get 28% more work done. We would save even more if the person was on an older system.
Even if the MSRP on the BOXX was roughly $3200, ROI is paid in less than a year!

So, the next time you are due for replacing a system that has become outdated or you are simply looking for the fastest system $$$$ can buy, I'd recommend you check out BOXX and their 4050 Xtreme!


Numbers & Graphs!
For simplicity, I'll list times & percentages first, followed with some graphs.
Hard numbers

Pretty graphs


Thursday, March 14, 2013

UnBOXXing the 3DBOXX 4050 XTREME

Today I was rather excited as I had a SMALL present delivered, courtesy of BOXX Technology. HMC is taking a look at their desktop system called 3DBOXX 4050 XTREME.

The system specs we currently use for Revit workstations are Dell T3600 with single socket, quad core hyperthreaded Xeon chips running @ 3.6GHz, 16GB RAM @ 1600MHz, nVidia Quadro 4000 graphics card and a 7200RPM 500GB hard drive with transfer rates @ 6GB/s.

The 3DBOXX 4050 XTREME specs are Single socket, quad core hyperthreaded  i7 - water cooled & overclocked @ 4.75GHz, 16GB RAM @ 1600MHz, nVidia Quadro 600 graphics card and a 7200RPM 500GB hard drive with transfer rates @ 6GB/s (expanded spec sheet).

I plan to run some Revit Benchmark testing on it sometime over the next couple weeks and post back what the results are. I fully expect an unfair fight, but I am trying not to get too confident the 4050 will trounce the Dell. In the meantime, here are the unBOXXing photos I took. This has to be one of the cleanest packaging jobs I've seen in a while, both inside the cardboard as well as inside the 4050. Some of the guys didn't feel the design of the outside of the 4050 was elegant, but I've always been a function over form type of guy. For me, I like it - it looks rugged, no non-sense, no frills and what's under the hood is what counts.
The BOXX

Cleeeeean....
Accessory boxx removed.
Accs. boxx - everything you need to expand the 4050, plus "the shirt".
The BOXX W4050XT sits in its unpackaged glory...
It's like a logo on a car almost...
Tons of ports, plenty of room to expand.
Sooo clean and simple - love it! HDD is on other side of panel behind motherboard.

Wednesday, December 5, 2012

Autodesk FormIt - Intro and Resources


Last week Autodesk announced FormIt - a new conceptual design application built from the ground up for the iPad. I had a chance to talk briefly with Tom Vallaro ( @tomvallaro ) after he presented FormIt to a group in an open theater at AU2012 and was really excited to hear some of the things they are working towards with FormIt (some of which I can't share here).

Have an iPad?
Do you like free apps?

Then check out FormIt! If you like Sketchup/Vasari, you will love how FormIt works.

Resources:
iTunes store link
Autodesk FormIt website
Autodesk Blog Revit Clinic
What Revit Wants
The Revit Kid

Tuesday, December 4, 2012

Music in my World of BIM (or how iTunes 11 left me longing for 10) - Off Topic

If you are a human, chances are you love music. For me, music really helps me get stuff done - especially when faced with a looming deadline. So imagine my surprise when I upgraded to iTunes 11 yesterday and the interface completely changed on me. Actually, I should have expected it, but it left me staring at a barren landscape with seemingly no way to find my playlists I've painstakingly built. Thus began the great button hunt of 2012. Below I can sum up in about 3 steps totaling 7 clicks on how you can get iTunes 11 looking pretty much like iTunes 10 (please note this is on Windows7 64bit OS).

In iTunes 10 I was still using a list view of my music library (playlists & radio too). I don't need giant squares showing album covers. Give me a list view!


Step one:
Activate the Menu Bar


Step two:
Turn on Sidebar & Status bar via the View menu pulldown


Sidebar:


Status bar:


Step 3:
Click Music (or radio if looking for stations)


Monday, September 24, 2012

Off Topic - Space Shuttle Overhead Video

So, I was able to successfully see the space shuttle fly overhead. I've posted my video to YouTube for those that haven't seen it. It was loud and low, flanked by 2 escort fighter jets - what a great experience! I'll never get to see that spaceship in the sky again and as it was major part of my childhood as I grew up, I was really glad I got to see it one last time in the air (even if it was strapped to the back of a 747).

Thursday, September 20, 2012

Off topic - STS-125 Atlantis

The last time I got to see a space shuttle, it was Atlantis taking off from Kennedy Space Center on mission STS-125 to make one last servicing to the Hubble telescope. Attached pic was the best I could get at the time with the equipment I had. Maybe now I will get a little closer to seeing one in the skies, one last time on Friday September 21st here in Southern California.

Off topic - SPACE SHUTTLE!!!!


***UPDATE***
Schedule below has been pushed out one hour to 8:30am departure from Edwards!
 
I can hardly contain myself! I have to thank my Boss for forwarding me the below approximate schedule for Endeavour as it travels from Edwards Air Force Base to LAX before making its ultimate journey through the streets of South Los Angeles en route to the Science Center:
THURSDAY
12:35 p.m.
Endeavour touches down at Edwards
FRIDAY
7:15 a.m.
Endeavour leaves Edwards
10:30 a.m.
Endeavour begins flyovers of several Southland locations (sequential order not released for security purposes):
Proud Bird Restaurant (LAX)
Griffith Observatory
Boeing Plant (Seal Beach)
California Science Center (Exposition Park)
Disneyland
Downtown Los Angeles
Hollywood Hills
Huntington Beach
Getty Center
Malibu
Venice
JPL Pasadena
Santa Monica Pier (Lucky fans will see the flyover from the Ferris wheel)
Space X (Hawthorne)
Universal Studios
Queen Mary and Aquarium
11:00 a.m. – 12:00 p.m.
Space Shuttle Endeavour arrives at LAX

Time to break out that telephoto lens!!! I hope I can catch a glimpse!!!

For more info, check out the California Science Center website.

Friday, September 7, 2012

Set your Phase(r) to Stun

I'm presenting a lunch workshop internally on Monday dealing with Phasing in Revit. I've settled on a title of "Stun your Coworkers with Phasing in Revit". Other titles that I kicked around or were suggested to me included:
  • Don’t Klingon to old habits, get stunned by phasing in Revit
  • Temporal Mechanics is not just for Trekkies – Phasing in Revit is for Everyone
  • Don’t be stunned by phasing in Revit
  • A new phase of your life in Revit
  • The time is now for a new Phase in Revit
  • Don’t let Revit phase you – Phasing made easy in Revit
  • Demolish any Misconceptions of Phasing in Revit
If you've ever wondered about my sanity, wonder no more...

Tuesday, August 21, 2012

New Splash Screen for Vasari Beta1

A much more appropriate splash screen for Vasari!

Vasari Beta1 - New Features


You've been waiting for Vasari compatibility with Revit 2013, haven't you? New features list from the Vasari Wiki (I like how the URL lists it as version 0):

The following features are new or enhanced for Vasari Beta 1.

  • Family editing. Now you can double-click an instance of a family in a project to open the family for editing. See Modifying Families in a Project (or Nested Family).
  • Surface Transparency Sliders. The Ghost Surfaces and Transparent Override options were replaced with a Surface Transparency slider. Now you can set a Surface Transparency override between 0-100 by Element, Category, Filter and View. Access the Surface Transparency slider from the Graphic Display Options dialog, or select an element, right-click, and select Override Graphics in View By Element, By Category, or By Filter.
  • Visualization Graphics. Anti-Aliasing now provides smoother lines for geometry in all views. See Hardware Acceleration.
  • Conceptual Design Environment. You can divide paths, curves, and form edges with nodes that can host components and component arrays. See Associative Division and Component Repetition.
  • Cloud Rendering. With a subscription to select Autodesk products, you can use the Autodesk 360 Rendering service to create photorealistic images and panoramas from any computer. See Cloud Rendering.
  • Revit 2013 file-format compatibility. Compatible with Revit 2013 and includes all the features from previous versions of Project Vasari.
I don't know about you, but I'm really glad to see they added support for online Cloud Rendering. My favorite though would have to be double click editing of families! Makes things so much easier to deal with!

For community support, check out the discussion forum they have going!

Also, don't forget the add-ins for Vasari - they've been moved to here: Add-ins Download page
This page includes:
  • Dynamo
  • SDK
  • Relationship Viewer
  • Parametric Sliders
  • Parameters from Image